Old Fashioned Lemon Pound Cake

When I think of the ultimate warm weather dessert I always think of this lemon pound cake. It’s delicious, buttery, lemony, vanilla all in one bite! I’m not lying when I say it’s impossible to be sad while eating this cake. I am often disappointed with lemon cakes because I feel like they either taste too artificial or I can’t taste the lemon. The secret to achieving the perfect lemon flavor is putting lemon in the batter, and then soaking it with a tart lemon glaze. This gives you lemon flavor you can taste without being too overpowering or artificial. The cake is topped off with a sweet vanilla icing to perfectly compliment the tart lemon glaze. It doesn’t get better than that. 

If you don’t want to read my tips on how to make pound cake then skip to the recipe here…I won’t be too sad. 

Skip to Recipe

When I first learned how to make pound cake it was described to me as “cake for those who can’t bake” because it’s literally a pound of everything. Pound cake has come a long way since then, but in my opinion it is still the easiest cake to bake.

Tips for making the best pound cake:

Don’t overmix the batter:

You know how when you make bread you have to knead the dough to help the gluten develop? This is what gives bread its chewy texture. The same thing happens with cake batter, except in this case it’s a bad thing. When you overmix it after adding the flour you will have a tough, chewy cake. I usually fold my flour in with a rubber spatula or mix it in on the slowest mixer setting until it is just mixed in. 

Measure the flour properly

Normally I like to bake using weight, but this recipe has not been converted into grams (yet). Cooking using weight means that you will get the right amount of the ingredient every time. Think about measuring a half a cup of brown sugar. If you pack it down, you can get almost double the amount of weight than if you just scooped it. This is why measuring in grams helps you get the best results every time. Because this recipe isn’t in grams you need to be careful about how you measure the flour. YOU CANNOT JUST SCOOP IT. That will pack the flour down and you will have too much. Use a spoon and spoon the flour into your measuring cup then level it off. I know it is extra work..just do it. 

Cream the sugar long enough:

We are looking for fluffy and light at this stage. I usually cream it for about a minute. This helps make sure everything is incorporated and keeps the batter light. 

Grease the pan the right way:

After all your hard work you put into making a cake, the last thing you want is your cake sticking to the pan. The best way I have found that doesn’t require parchment paper is to butter the entire pan and coat it with flour. The only thing to note with this method is the outside of the cake will be darker. I think it tastes better this way (mmm browned butter) but I understand this may not be a desired effect for some people.  

Choosing the right pan:

This pound cake is pretty versatile, you can make it in just about any kind of pan. I usually choose a bundt pan but I have done a loaf before too and it works! Just be aware that something in a smaller pan will bake quicker. Never fill the pan more than ⅔ full. 

How to make lemon pound cake

In a medium sized bowl, mix together dry ingredients.

In a mixer or another bowl, mix the butter and vegetable oil together until fully incorporated. 


Add the sugar and cream until light and fluffy.

Add the eggs one at  a time, mixing after each one. 

Alternate adding the flour mixture and milk. Mix in between each addition until just incorporated. Start with dry ingredients. 

Add in vanilla, lemon zest, and the juice of 1.5 lemons. Mix until just combined. 

Pour into a greased pan and bake at 350 degrees Fahrenheit for about an hour. Check with a toothpick starting around 50 min. It should come out clean when the cake is done. 

Pour the glaze on the cake

Let cool in the pan for about 10 minutes then turn out onto a wire rack. 

In a small bowl mix together the juice from 1.5 lemons and 1/2 – 1 cup of powdered sugar (depending on how sweet you want the cake). 

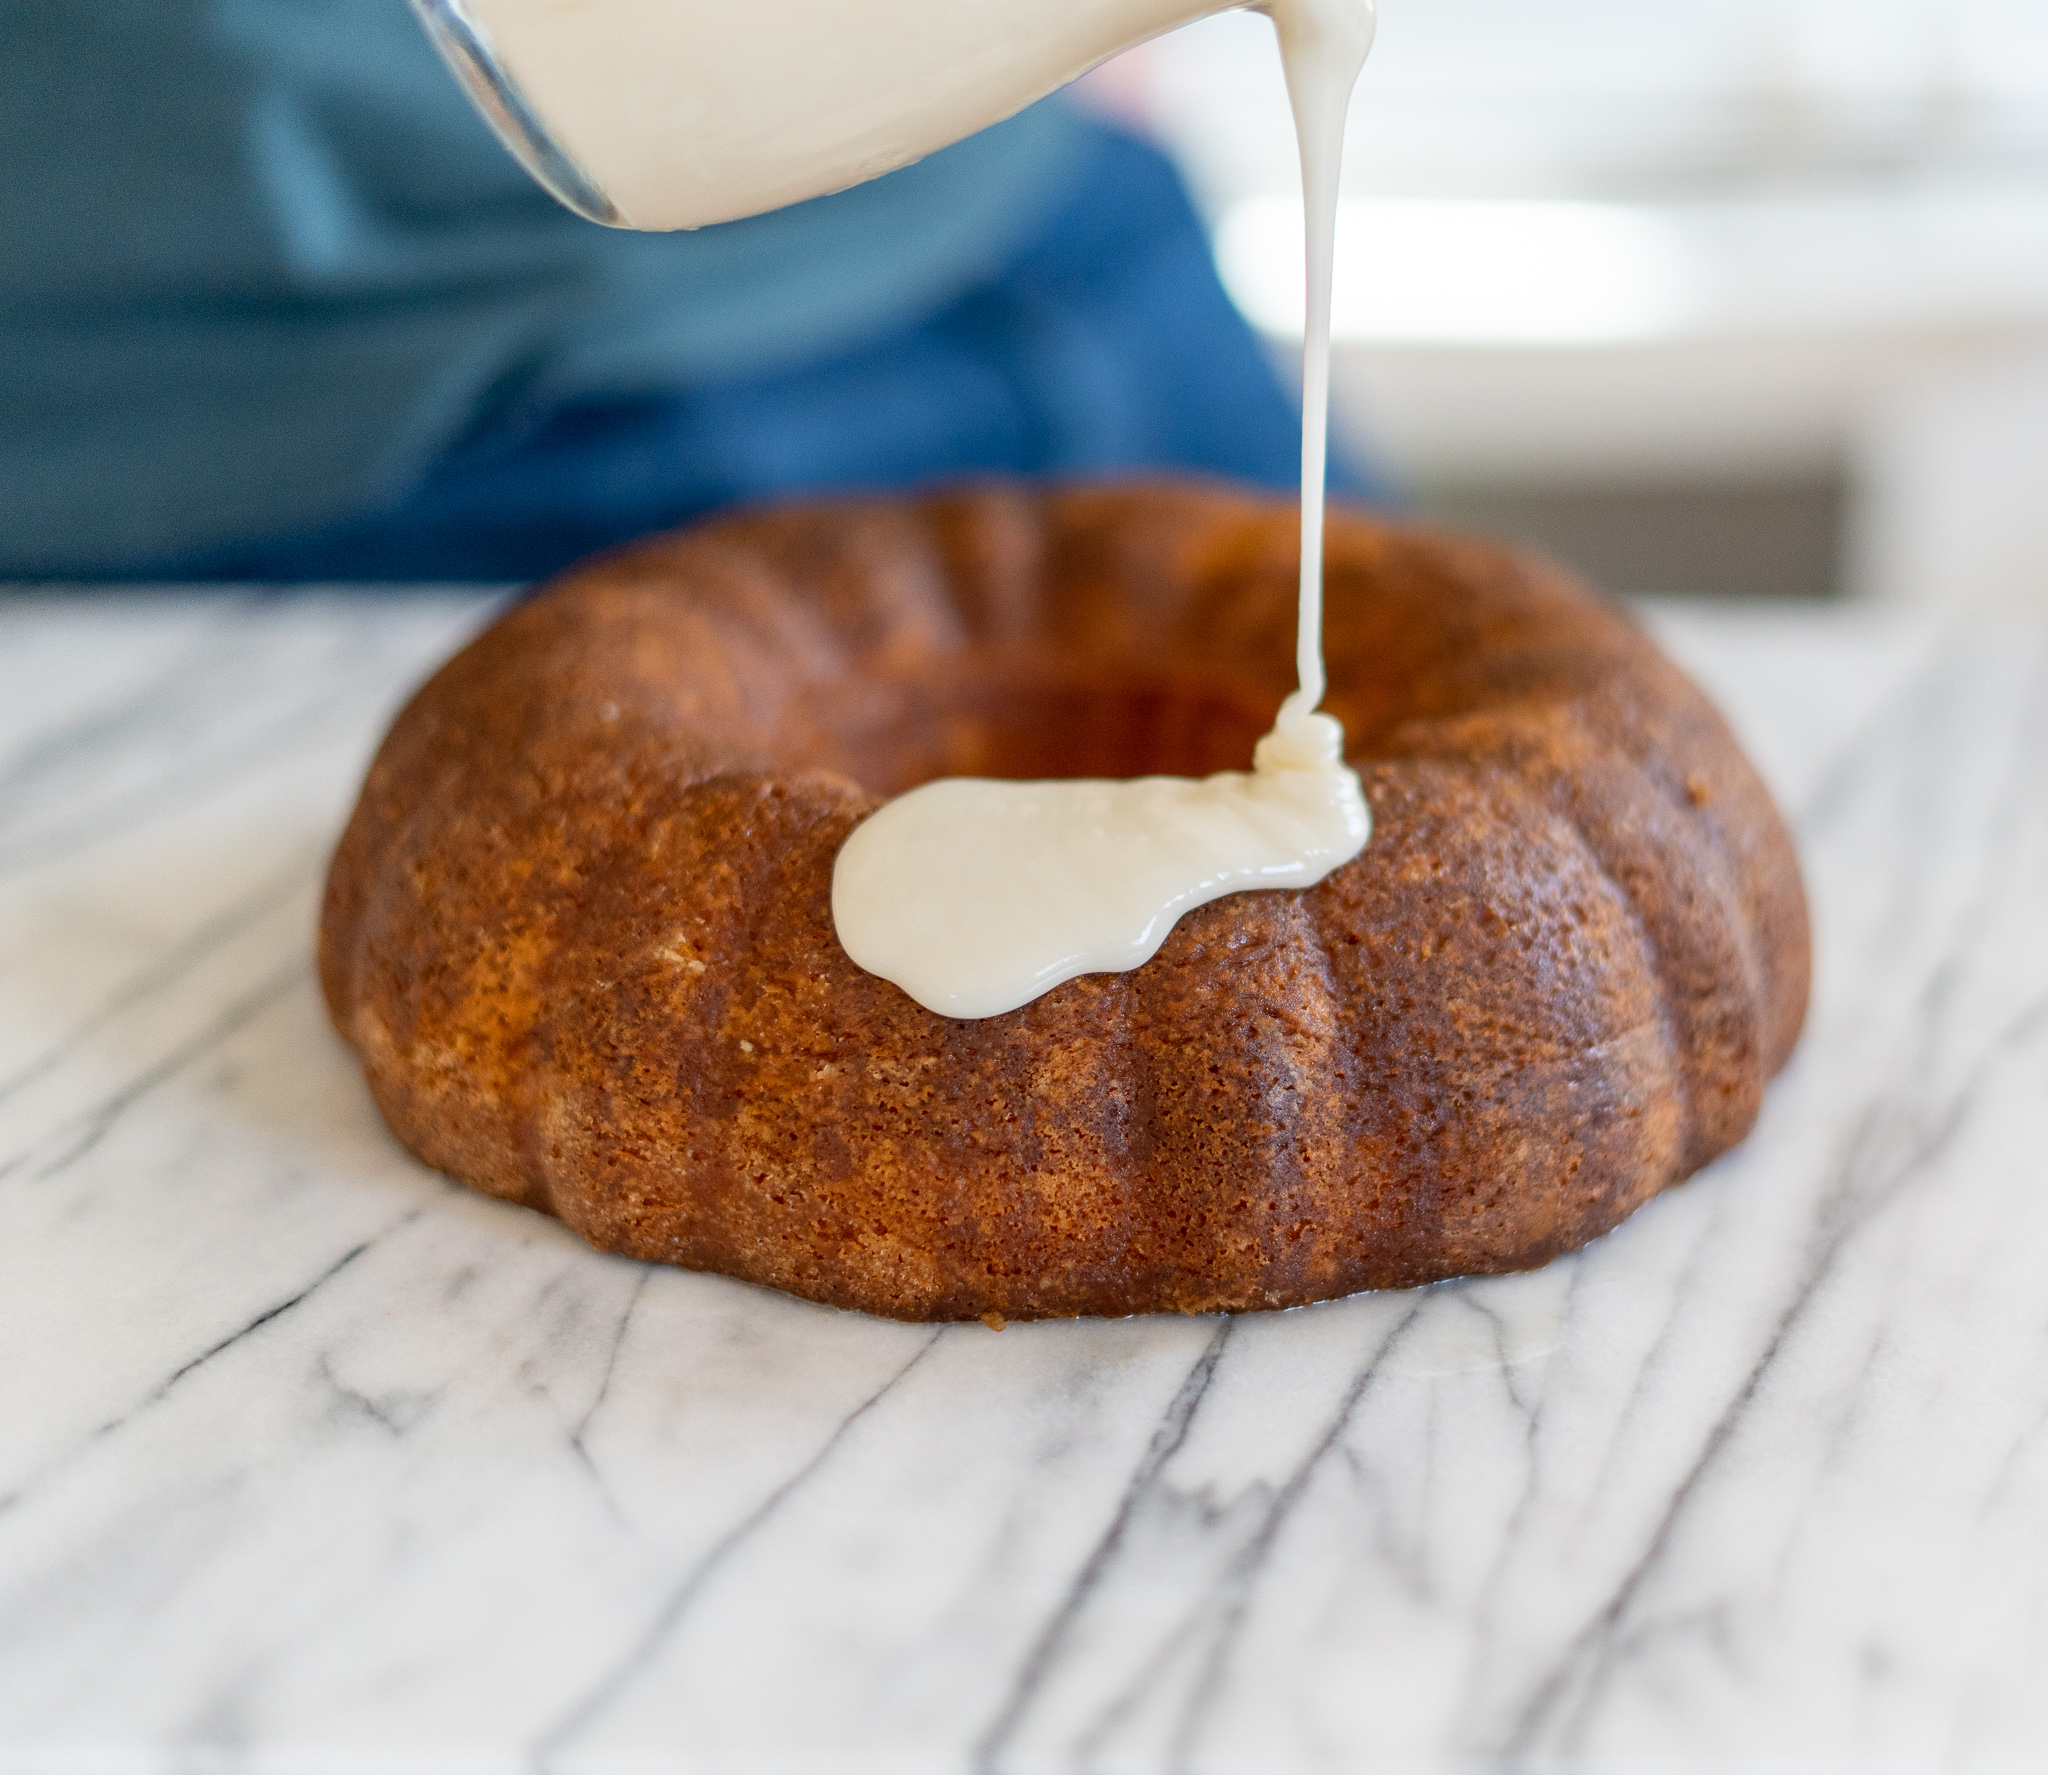
Use a toothpick to poke holes in the top of the cake. Pour the lemon juice mixture evenly over the cake (it will still be a bit warm at this stage, that’s okay. 

Poke holes in the cake using a toothpick

Make the icing by mixing 1.5 cups of powdered sugar with 1-2 tbsp of milk and ½ tsp vanilla. The icing should be able to drip but not be runny (think the consistency of honey). 

Vanilla icing

Pour the icing over the cake and garnish with lemon zest. 

Garnish with lemon zest

Enjoy!

Print

Old Fashioned Lemon Pound Cake

Course Dessert
Cuisine American
Keyword cake, easy, lemon, pound

Ingredients

For the cake:

  • 1 cup butter softened
  • ½ cup vegetable oil
  • 3 cups sugar
  • 5 eggs
  • 3 cups all purpose flour
  • ½ tsp salt
  • ½ tsp baking powder
  • 1 cup whole milk
  • 2 tsp vanilla
  • 1.5 lemons juiced
  • lemon zest

For the glaze

  • 1.5 lemons juiced
  • 1 cup powdered sugar

For the icing

  • cups powdered sugar
  • 1-2 tbsp whole milk
  • ½ tsp vanilla

Instructions

Prep

  • Zest and juice the 3 lemons.
  • Preheat oven to 350°

To make the cake

  • In a medium sized bowl, mix the flour, salt, and baking powder.
  • In a large bowl or mixer, cream the butter and oil together. Add the sugar a little at a time. Mix until light and fluffy.
  • Add the eggs one at a time, beating after each addition
  • Starting with the dry ingredients, alternate adding dry ingredients and milk while mixing slowly.
  • Add half of the lemon juice, lemon zest (save some for garnish), and vanilla.
  • Pour batter into greased pan and bake for 1-1½ hours or until a toothpick comes out clean. While cake is baking, make the glaze.

To make the glaze

  • In a small bowl, mix together lemon juice and powdered sugar until it makes a thin glaze. If it is too thick add water a teaspoon at a time.
  • Once the cake is done, let cool on a wire rack for 10 min then use a toothpick to poke holes in the top of the cake.
  • Pour the glaze evenly over the cake then let it cool completely.

To make the icing

  • Mix the powdered sugar, milk, and vanilla together in a bowl. If the icing is too thick add milk, if it is too thin add powdered sugar. It should be the consistency of honey.
  • Pour the icing over the cooled cake and garnish with remaining lemon zest.
  • Enjoy!
Why You Should Make Your Own Vinaigrette

Why should you be making your own vinaigrette? 

Can we all take a moment to agree that we need salad dressing in our lives? Good, because spinach on its own is kinda gross. There are probably 100 reasons you should make your own salad dressing but for this post I am going to focus on the top 3. 

The three biggest reasons you should be making your own salad dressing: 

1. Healthier

Have you ever looked at the ingredients on a salad dressing bottle? There’s a lot of weird stuff that definitely doesn’t need to be there. Also anything that has an expiration date that’s 5 years away just feels weird. It’s probably closer to a twinkie than salad dressing. Making your own dressing gives you 100% confidence that you know what you exactly are eating.

2. Tastes WAY better

You are using fresh and REAL ingredients, it really makes a difference in the taste.

3. Customizable

This is the best thing about making your own dressing, you can make it however you want. You can add more herbs or more salt if you like it that way. ULTIMATE SALAD DRESSING FREEDOM…you can’t put a price on that.

Need I say more??

Now I know you are thinking 

WhAt iF I DoN’T HaVe TiMe??

The amount of time it takes you to put four ingredients in a jar and shake it up is less time than it takes you to pick out dressing at the store…just sayin.

Every vinaigrette starts with 4 basic ingredients.

-Oil

-Acid

-Salt

-Pepper 

Balsamic Vinaigrette

The 4 PEOPLE WHO MAKE A SALAD DRESSING

Huh? Yes, this is the way I was taught, so stick with me. Each person is in charge of a different ingredient in the dressing so you end up with the perfect amount of each item. It’s all about balance.

Cheesy, I know, but this is how I remember it.

Spendthrift- Olive oil

Miser- Vinegar

Wise man- Salt 

Crazy man- Pepper

Spendthrift-

Oil is the base of the vinaigrette. It carries everything. The spendthrift is in charge of the olive oil, because there is more of it than anything else in the dressing. For this you are going to want to use EXTRA VIRGIN OLIVE OIL. No exceptions and for dressing it is worth it to spend an extra $2 to get something better than what you usually get…trust me.  Use as much oil as you want dressing.

Miser-

Vinegar is really what makes a vinaigrette, but since it’s such a strong flavor the miser puts it in…Be a lil’ stingy. Think 2 parts oil, one part vinegar.  

Wise Man-

You can’t have a dressing without salt, but the vinegar adds the illusion of saltiness too. Be wise with the salt; you can add more later, but you can’t take it out after it’s in (how’s that for cooking wisdom?).

Crazy Man-

In my opinion you can never have too much pepper. Go crazy my friend. 

Additional Tips:

Now while those four ingredients make a fine vinaigrette you will quickly run into one problem…oil and vinegar don’t mix very well. You can stick to those for ingredients and have a great vinaigrette orrr you can add a couple more things and have an AMAZINGLY MIND BLOWING vinaigrette.

Dijon Mustard- This is an emulsifier. AKA it helps the oil and vinegar mix better and not separate as easily. Think of it as glue. 

Honey- A little bit of sweet takes your dressing to the next level… and it’s more glue. 

Spices- Spice it up a lil’ bit

Now here’s where it gets really crazy…

Now that we have our map we can go crazy with different combinations and build different flavors….WHAT?

TIP: Try swapping out vinegar for lemon juice and you have a fantastic lemony dressing

TIP: Use balsamic vinegar and you have a vinaigrette better than anything you can find on a shelf.

TIP: Instead of honey add a scoop of raspberry jam and you have a raspberry vinaigrette.

TIP: Use lemon juice and add honey and dill…ultimate summer salad dressing.

TIP: Use white wine vinegar with Italian spices/herbs and you have a salad dressing that would rival any Italian restaurant.

TIP: Use half apple cider vinegar, half lemon juice, and add some Greek spices. Put that on your next pasta salad!

THE POSSIBILITIES ARE ENDLESS!

Ready for part two of crazy?

 Dressing is completely customizable to your tastes. For example, I usually add a bit more salt to mine because I’m a lil’ salty… but seriously you can make it completely to your taste. Make a few different dressings to figure out what you like. 

I make my dressing in a jar, then shake it up and leave it in the fridge. It doesn’t get any easier than that to have fresh and delicious salad dressing. 

Check out my Winter Kale Salad to see how to use your new vinaigrette making abilities!

Winter Kale Salad

Do you like salad? Salad can either be really good or really bad. Making a good salad is an art form. Most people assume if you pour some bottled dressing over spinach that’s as good as it gets. There’s a whole world of fantastic salads just waiting to be explored. Salad is all about getting different textures, colors, and flavors together to create something better than the sum of its parts. I don’t think salad is meant to be in recipe form, but to help get some creative juices flowing for you guys, I put together this winter kale salad recipe. 

The secret is…

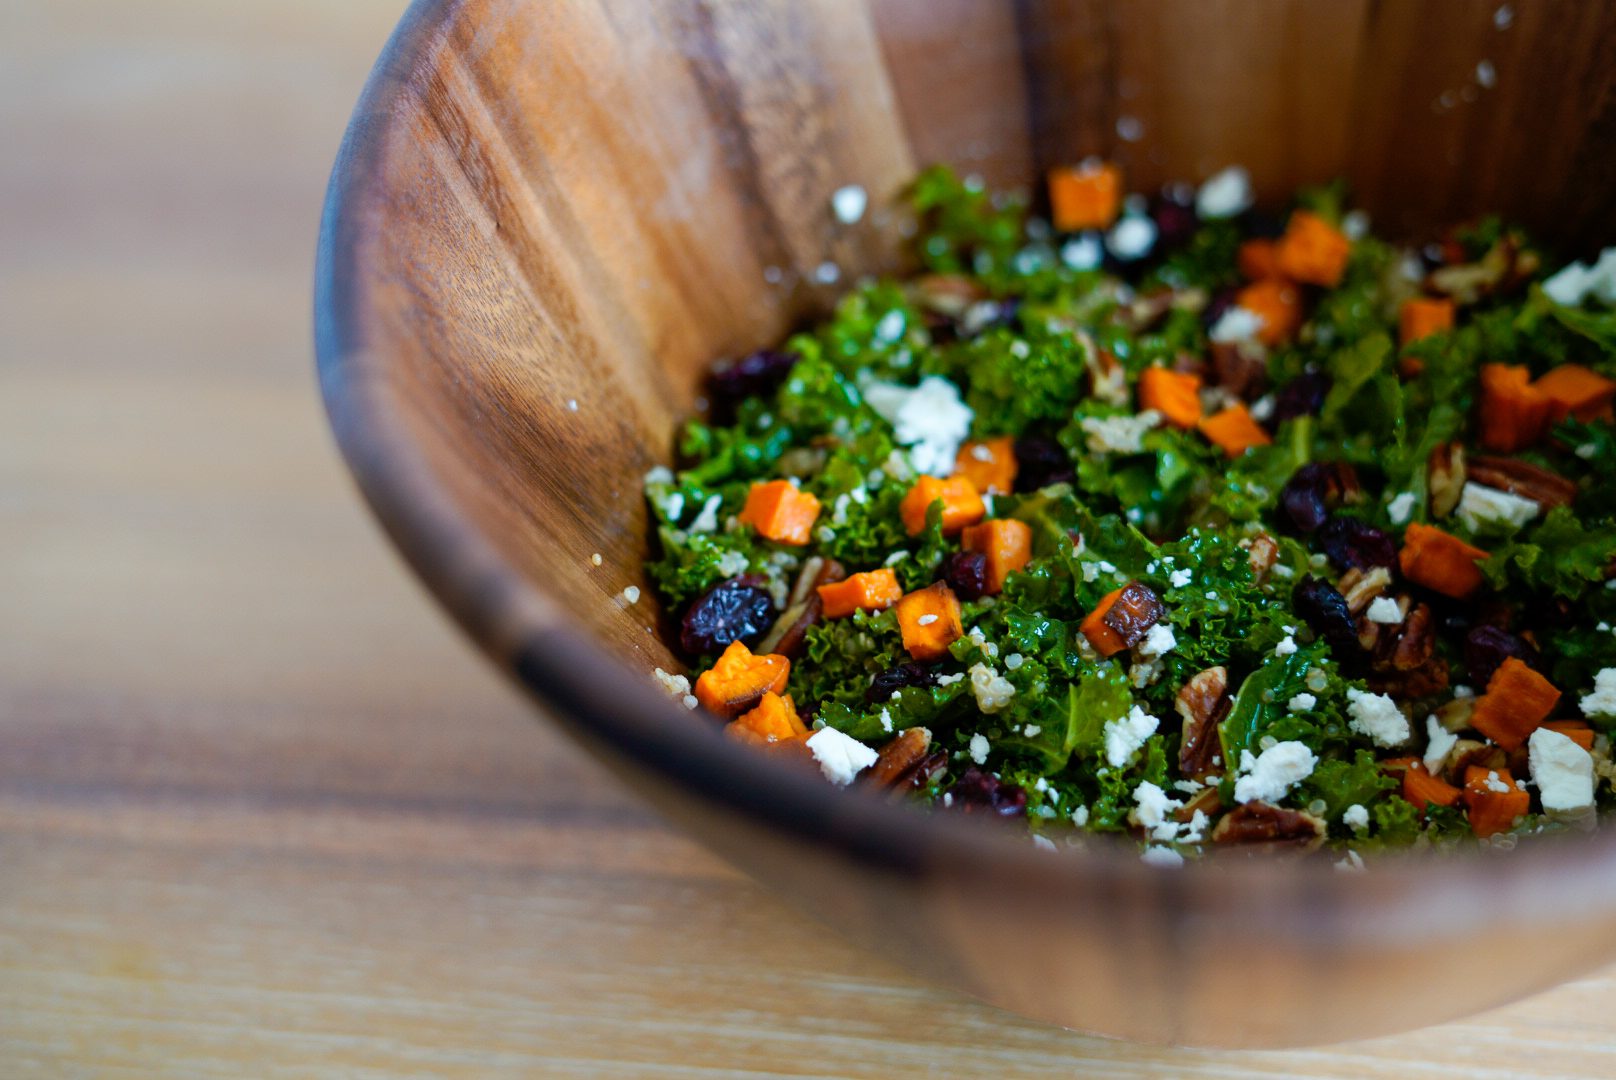
This salad exemplifies what we want a salad to be. It has the perfect balance of sweet and salty with lots of textures to keep you interested and coming back for more. Kale is the real star of the show here, and I am going to show you how to serve this strange plant in a way you will actually enjoy eating.

The dressing is a lemony dijon dressing that compliments the flavor and adds brightness. 

This salad is also great for meal prep! Put the dressing in the bottom of your container, then the veggies, and the greens on top. Give it a mix when it’s time to eat and you have a delicious and healthy salad on the go! 

Some Notes:

We all know that kale is the holy grail of leafy greens…too bad it tastes like dirt. We try to sneak it into smoothies or soups and pretend that it isn’t there. It’s time to bring kale out of the closet and let it shine. There are two things that take kale from a strange backyard weed to king of the vegetables. 

1. Acid

Something about the acidity takes away the dirt flavor. In this salad we are using lemon juice in the dressing to add brightness. The acid also helps to disguise the bitterness in greens so they have a better flavor. 

2. Massage

Massaging the kale helps to break down the stiff texture and helps it to absorb the flavor of the dressing. ALWAYS MASSAGE YOUR KALE. I know it’s a bit weird but it seriously makes all the difference! Massage it for 30 seconds to a minute. 

To achieve flavor balance…

I always add some sort of sweet item to my salads. It gives it interest and rounds out the flavors. In this salad, I use cranberries and sweet potato to give us the winter cozy vibes in salad form.

When it comes to the crunchy texture in a salad I almost always choose nuts over croutons. Nuts don’t absorb the dressing and get soggy like croutons so your texture is preserved. I use pecans in this recipe but you could easily substitute them with sliced almonds, pine nuts, or walnuts. Whichever nuts you use, make sure to toast them to achieve that deep flavor profile!

I like to add a nutrient rich grain to my salads to make it more filling and add more texture. Quinoa is my go to. 

The last texture that all salads need is something creamy. In this case I use goat cheese. It’s earthy, creamy, and brings the whole salad together. 

You can also add:

-Seeds: Sunflower or pumpkin

-Roasted chickpeas

-Roasted red peppers

-Roasted or pickled beets

-Pickled red onions

The dressing:

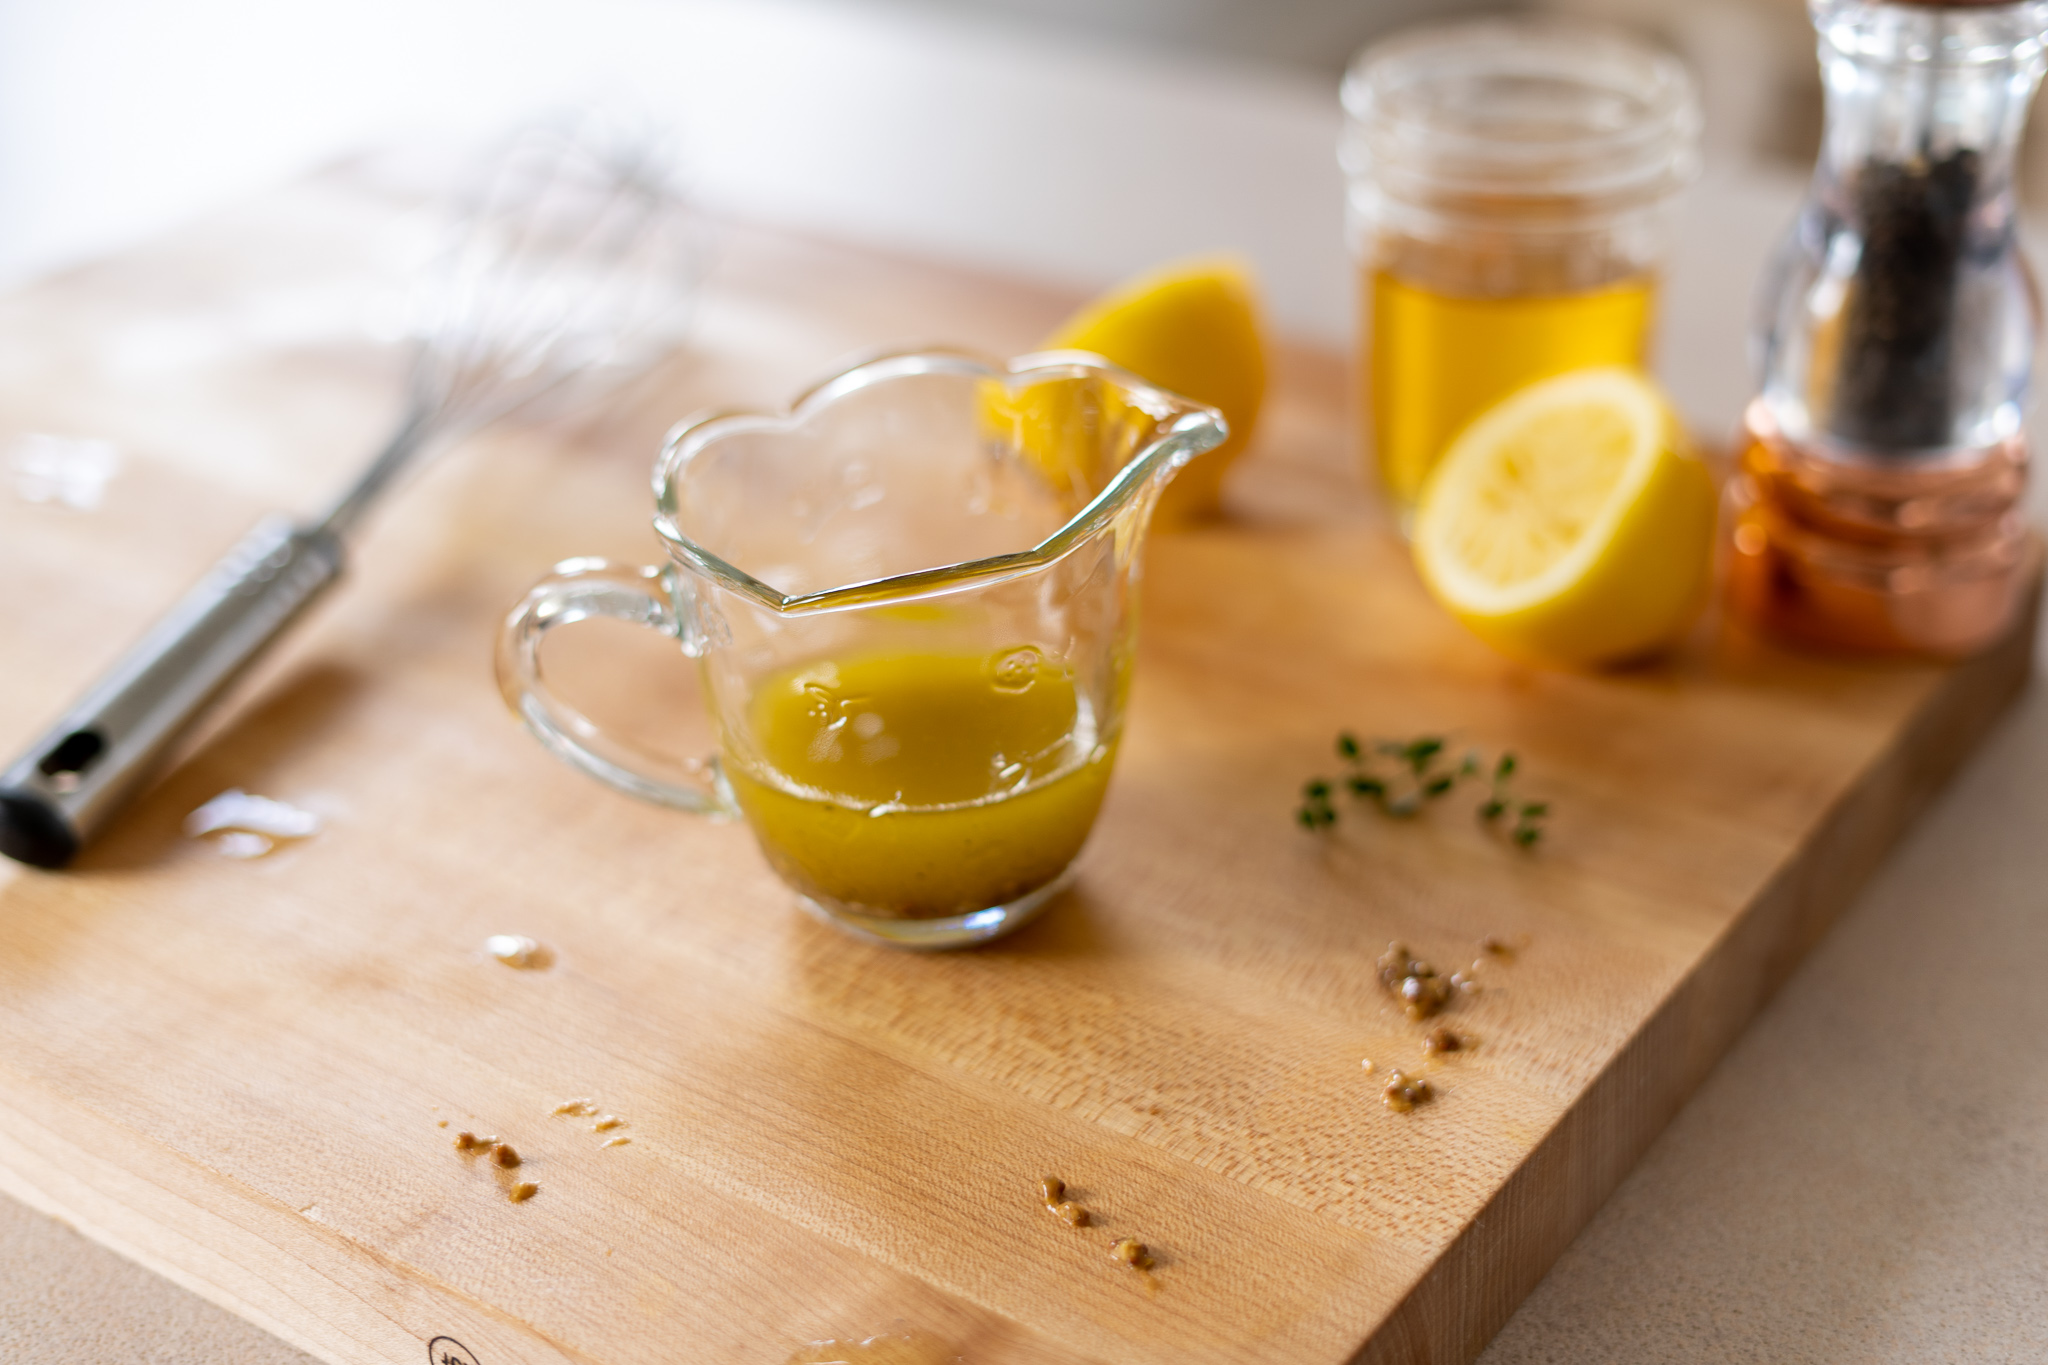
For the dressing, I make a lemony dijon dressing to compliment the flavors in the salad and add brightness. Add all the ingredients to a jar and shake! It’s as easy as that! 

Hope you guys enjoy this winter kale salad! 

Print

Winter Kale Salad

Ingredients

  • 1 Sweet potato
  • 1 cup Quinoa cooked
  • 4 cups Kale
  • 1/2 cup Goat cheese
  • 1/2 cup Dried cranberries
  • 1/2 cup Pecans Toasted

Dressing:

  • 1/4 cup Olive oil
  • 2 Lemons juiced
  • 2 tbsp Honey
  • 1 tsp Salt
  • Pepper
  • 1 tsp Dijon mustard

Instructions

  • Peel and dice the sweet potato. Roast in a 400° oven until soft.
  • Prepare quinoa according to the instructions on the package.
  • Add all dressing ingredients to a large bowl (large enough for your salad) and whisk until all ingredients are combined. Taste and add salt/ honey to your preference.
  • Wash and chop kale then add to the bowl and massage with the dressing for at least 30 seconds.
  • Add remaining ingredients to the salad and toss.
  • Serve and enjoy!

Prosciutto Wrapped Asparagus

When it comes to making “fancy” food this asparagus is a real show stopper and doesn’t take much work at all! These asparagus bundles are wrapped in a layer of salty prosciutto, and then a layer of buttery puff pastry. They are the perfect compliment to any meal or even just to snack on (I have definitely done this). 

These prosciutto wrapped asparagus bundles from heaven look like you spent hours slaving away in the kitchen when really these only take about 30 minutes to make. These are great for days when you really are spending hours preparing a meal. 

What really makes this asparagus so good? The puff pastry. It is buttery and flaky and just feels like you are eating a cloud. 

What is puff pastry? 

Layer and layers of pastry that puffs up when you cook it. It is flaky and buttery and totally takes prosciutto wrapped asparagus to the next level. Puff pastry is pretty labor intensive to make but luckily you can buy it in the freezer section at most stores. If you are an overachiever and want to make your own puff pastry…you are a much more patient person than me. I have made puff pastry twice and I will never do it again. This is one of the very few things I will just purchase premade.

Some Notes:

Asparagus: My asparagus was pretty thin, so I bundled them together in bunches of 3-4. If your asparagus is thicker, you can probably stick to 1-2.

Prosciutto: I cut my prosciutto in half lengthwise to stretch it a bit (this stuff is a bit expensive so I try to get the most out of it). 

Puff pastry: You can make your own but I recommend just buying some from the freezer section. Make sure to let it thaw before using so it is easy to use. If you try to use it while it is frozen you won’t be able to wrap it around the asparagus and it won’t cook properly. 

Wrap your asparagus in the prosciutto and then wrap with puff pastry. Egg wash if you’d like, it doesn’t make a difference in the taste. 

Bake at 400*F for 15 min. 

For a bonus flavor explosion, brush with garlic butter when they come out of the oven. 

Here you have it! A fantastic appetizer that doesn’t take long to make and does not disappoint. 

Enjoy!

Print

Course Appetizer, Side Dish
Keyword appetizer, aspragus, easy
Servings 10

Ingredients

  • 1 bunch asparagus
  • 6 slices proscuttio
  • 2 sheets puff pastry

Instructions

  • Thaw out the puff pastry
  • Preheat oven to 400°
  • Separate your asparagus into bunches of 3-4 if they are small or 1-2 if they are large.
  • Cut the prosciutto in half lengthwise and wrap the strips around the asparagus bundles.
  • Roll out the puff pastry into a rectangle slightly larger than the one you started with (about 1 inch in each direction). Slice into ¾ inch strips and wrap around the asparagus.
  • Optional: Brush the tops with an egg wash (1 egg and a splash of water whisked together)
  • Bake for 15 min.
  • Optional: Brush the tops with garlic butter
  • Enjoy!
Honey Pear Bruschetta

I have a small obsession with bruschetta. I don’t know if it’s the toasty bread or the pile of toppings, but I’m hopelessly obsessed with this honey pear bruschetta. 

What is bruschetta?

Bruschetta is Italian and consists of a toasted piece of bread with toppings. Crostini is also Italian meaning “little toasts.” These are smaller rounds, also with toppings. Bruschetta and crostini are essentially the same thing but bruschetta is usually a bit larger. Traditionally bruschetta is garlic, tomato, and basil on toasted bread. Modern day bruschetta’s have a ton of variety in toppings and spreads. They can be savory, sweet, or both! 

This honey pear bruschetta has everything you could want: toasty bread, salty and creamy brie cheese, and spiced sweet honey pear chutney 

All of that in one bite is almost unfair. 

The other great thing about bruschetta is its SIMPLE. It’s all about layering 1-2 simple ingredients to create a mind blowing combination all in one bite. You don’t want too many things going on or you start to lose flavors in the craziness. 

This honey pear bruschetta is a salty sweet combo that is sure to impress. Just be careful to not fill up on this stuff before dinner… Seriously. It will happen. Be careful.

How to make honey pear bruschetta:

There are 3 components to this bruschetta:

  • Bread
  • Cheese
  • Chutney 

Bread

For the bread, I usually choose a baguette. I like the crust and they toast beautifully. Slice it on a 45 degree angle for maximum surface area. Brush on BOTH sides with olive oil and toast under the broiler until crisp. Here is my BIGGEST tip of the day. DO NOT TAKE YOUR EYES OFF THE TOAST. They will burn the second you look away. You have no idea how many hours I have spent scraping burnt bits off toast with a butter knife (yes this does work if you burn them). Just save yourself some grief and watch them. 

Cheese

The best cheese for this bruschetta is brie. It’s creamy and salty and compliments the pears perfectly. In my opinion, it is always worth spending a little more to get better cheese. Good cheese makes a HUGE difference. Please…spend the extra $2 and get something a little better. The brie needs to be room temperature to spread easily. Don’t forget to take it out of the fridge about 45 min before you plan on assembling the bruschetta. 

Chutney

The honey pear chutney is really simple to make but does take about 40 min to let it simmer down completely. Luckily it doesn’t need very much attention during that time. The idea here is to cook the pears down until they are soft and give all the flavors time to develop.  You can add chopped walnuts to the chutney for extra texture but that is totally up to you. For the chutney, add all your ingredients to a medium sized pot and simmer while stirring occasionally for about 40 min. The chutney needs to be thick enough to not drip off the bread. At the end stir in 1tbsp of butter and you are ready to serve! 

Assembly

When it comes to assembling the bruschetta, you can pre-assemble or you can leave the ingredients out for people to build their own. 

These ingredients can also be made ahead of time or even the day before! This is great for holidays so you can have an appetizer ready to go the day of.

There you have it! Honey pear bruschetta! I hope you guys enjoy this salty sweet appetizer.  

Print

Honey Pear Bruschetta

Course Appetizer
Keyword appetizer, bruschetta, easy

Ingredients

  • 1 baguette
  • 1 brie wheel
  • 2 pears diced
  • cup water
  • 2 tbsp honey
  • 1/4 cup brown sugar
  • 1 tsp salt
  • 1 tsp balsamic vinegar
  • 1 tbsp butter
  • fresh thyme

Instructions

  • Slice the baguette on a 45 degree angle and toast.
  • In a medium sized pot add in the pears, water, honey, and brown sugar.
  • Bring to a simmer over low heat and simmer for about 40 minutes. The pears should be soft and will have made a thick chutney. It needs to hold together enough to not fall off the bread!
  • Add the balsamic and salt. More salt may be needed, taste before you add more.
  • Stir 1 tbsp of butter into the chutney.
  • To assemble the bruschetta: Spread about 2 tablespoons of brie on the toasted bread then top with the pear chutney.
  • Garnish with fresh thyme.
  • Enjoy!

Ginger Spiced Cookies

Do you love holiday cookies? ME TOO! Here’s a bit of advice from me to you:

STOP BUYING PREMADE HOLIDAY COOKIE DOUGH.

Here’s why you should make your own:

  • They taste better.
  • There aren’t a bunch of strange chemicals in them.
  • You can make as many as you want.
  • You can still eat the cookie dough…just use pasteurized eggs.
  • They make your house smell fantastic.
  • It’s a fun family activity.

Plus, all the spiced deliciousness in cookie form?? Sign me up!

These cookies are chewy, gingery, spiced circles from heaven. 

I came across this recipe by accident. I was craving some fall spiced goodness, so I mixed a bunch of different cookie recipes together and came up with this. They have nice, crisp edges and a chewy center.

Don’t these make you want to curl up with a good book and a cup of tea?

These cookies are super simple to make, but here are some tips to get the best results: 

  • Measure your flour by spooning it into the measuring cup, then level it off.
  • Do not overmix your cookies. Mix until just barely incorporated.
  • Refrigerate your dough! I know it takes extra time, just do it.
  • Sprinkle with cinnamon when they come out of the oven for ultimate spiced goodness!

Enjoy!

Print

Ginger Spice Cookies

Course Dessert
Keyword cookies, easy, fall, ginger, holiday, spiced
Prep Time 30 minutes
Cook Time 30 minutes
Refrigerate 30 minutes
Servings 8

Ingredients

  • ½ cup brown sugar
  • cup white sugar
  • ½ cup butter softened
  • 1 egg
  • 3 tbsp molasses
  • 1 ½ cup all-purpose flour
  • 1 tsp baking soda
  • 1 tsp fresh ginger minced
  • ½ tsp cinnamon
  • ¼ tsp cardamom
  • ½ tsp nutmeg
  • tsp clove
  • ½ tsp salt
  • ¼ tsp black pepper
  • ¼ cup sugar set aside in a bowl

Instructions

  • Preheat oven to 350°
  • In a large bowl or stand mixer, cream together the butter and sugars until fluffy.
  • Add in the egg, molasses, and vanilla. Mix until combined.
  • Add the flour, baking soda, and spices. Mix until combined.
  • Refrigerate for 15-45 min.
  • Form 1 inch balls and roll in 1/4 cup sugar. Place cookies on a baking sheet.
  • Bake for 8-10 min or until the edges look dry.
  • Sprinkle with cinnamon and enjoy!

THE BEST Spinach & Artichoke Dip

When it comes to guilty pleasure foods, spinach artichoke dip is definitely one of my favorites. It doesn’t get much better than a pita chip piled high with creamy, salty, cheesy delicious dip. It even has spinach in it so it’s healthy, right? Okay even if it isn’t super healthy, this is definitely good for the soul. This is THE BEST spinach and artichoke dip.

It’s always strange to me that people buy pre-made spinach artichoke dip…this is SO much better and SO easy! Try it and it will CHANGE your life. IT’S THAT GOOD. 

If you don’t want to read on and on about how to make this recipe, you can skip to it below. My feelings won’t be hurt too bad.

Jump to Recipe

Now that you are all hyped up here’s some notes: 

Spinach: I 100% recommend using fresh. I have tried it with frozen and it isn’t the same. 

Artichokes: It’s best to use frozen artichokes in the steam-able bag. The marinated artichoke hearts add too much oil. You can use artichoke hearts canned in water but make sure to dry them really well so you don’t add unnecessary moisture to the dip.

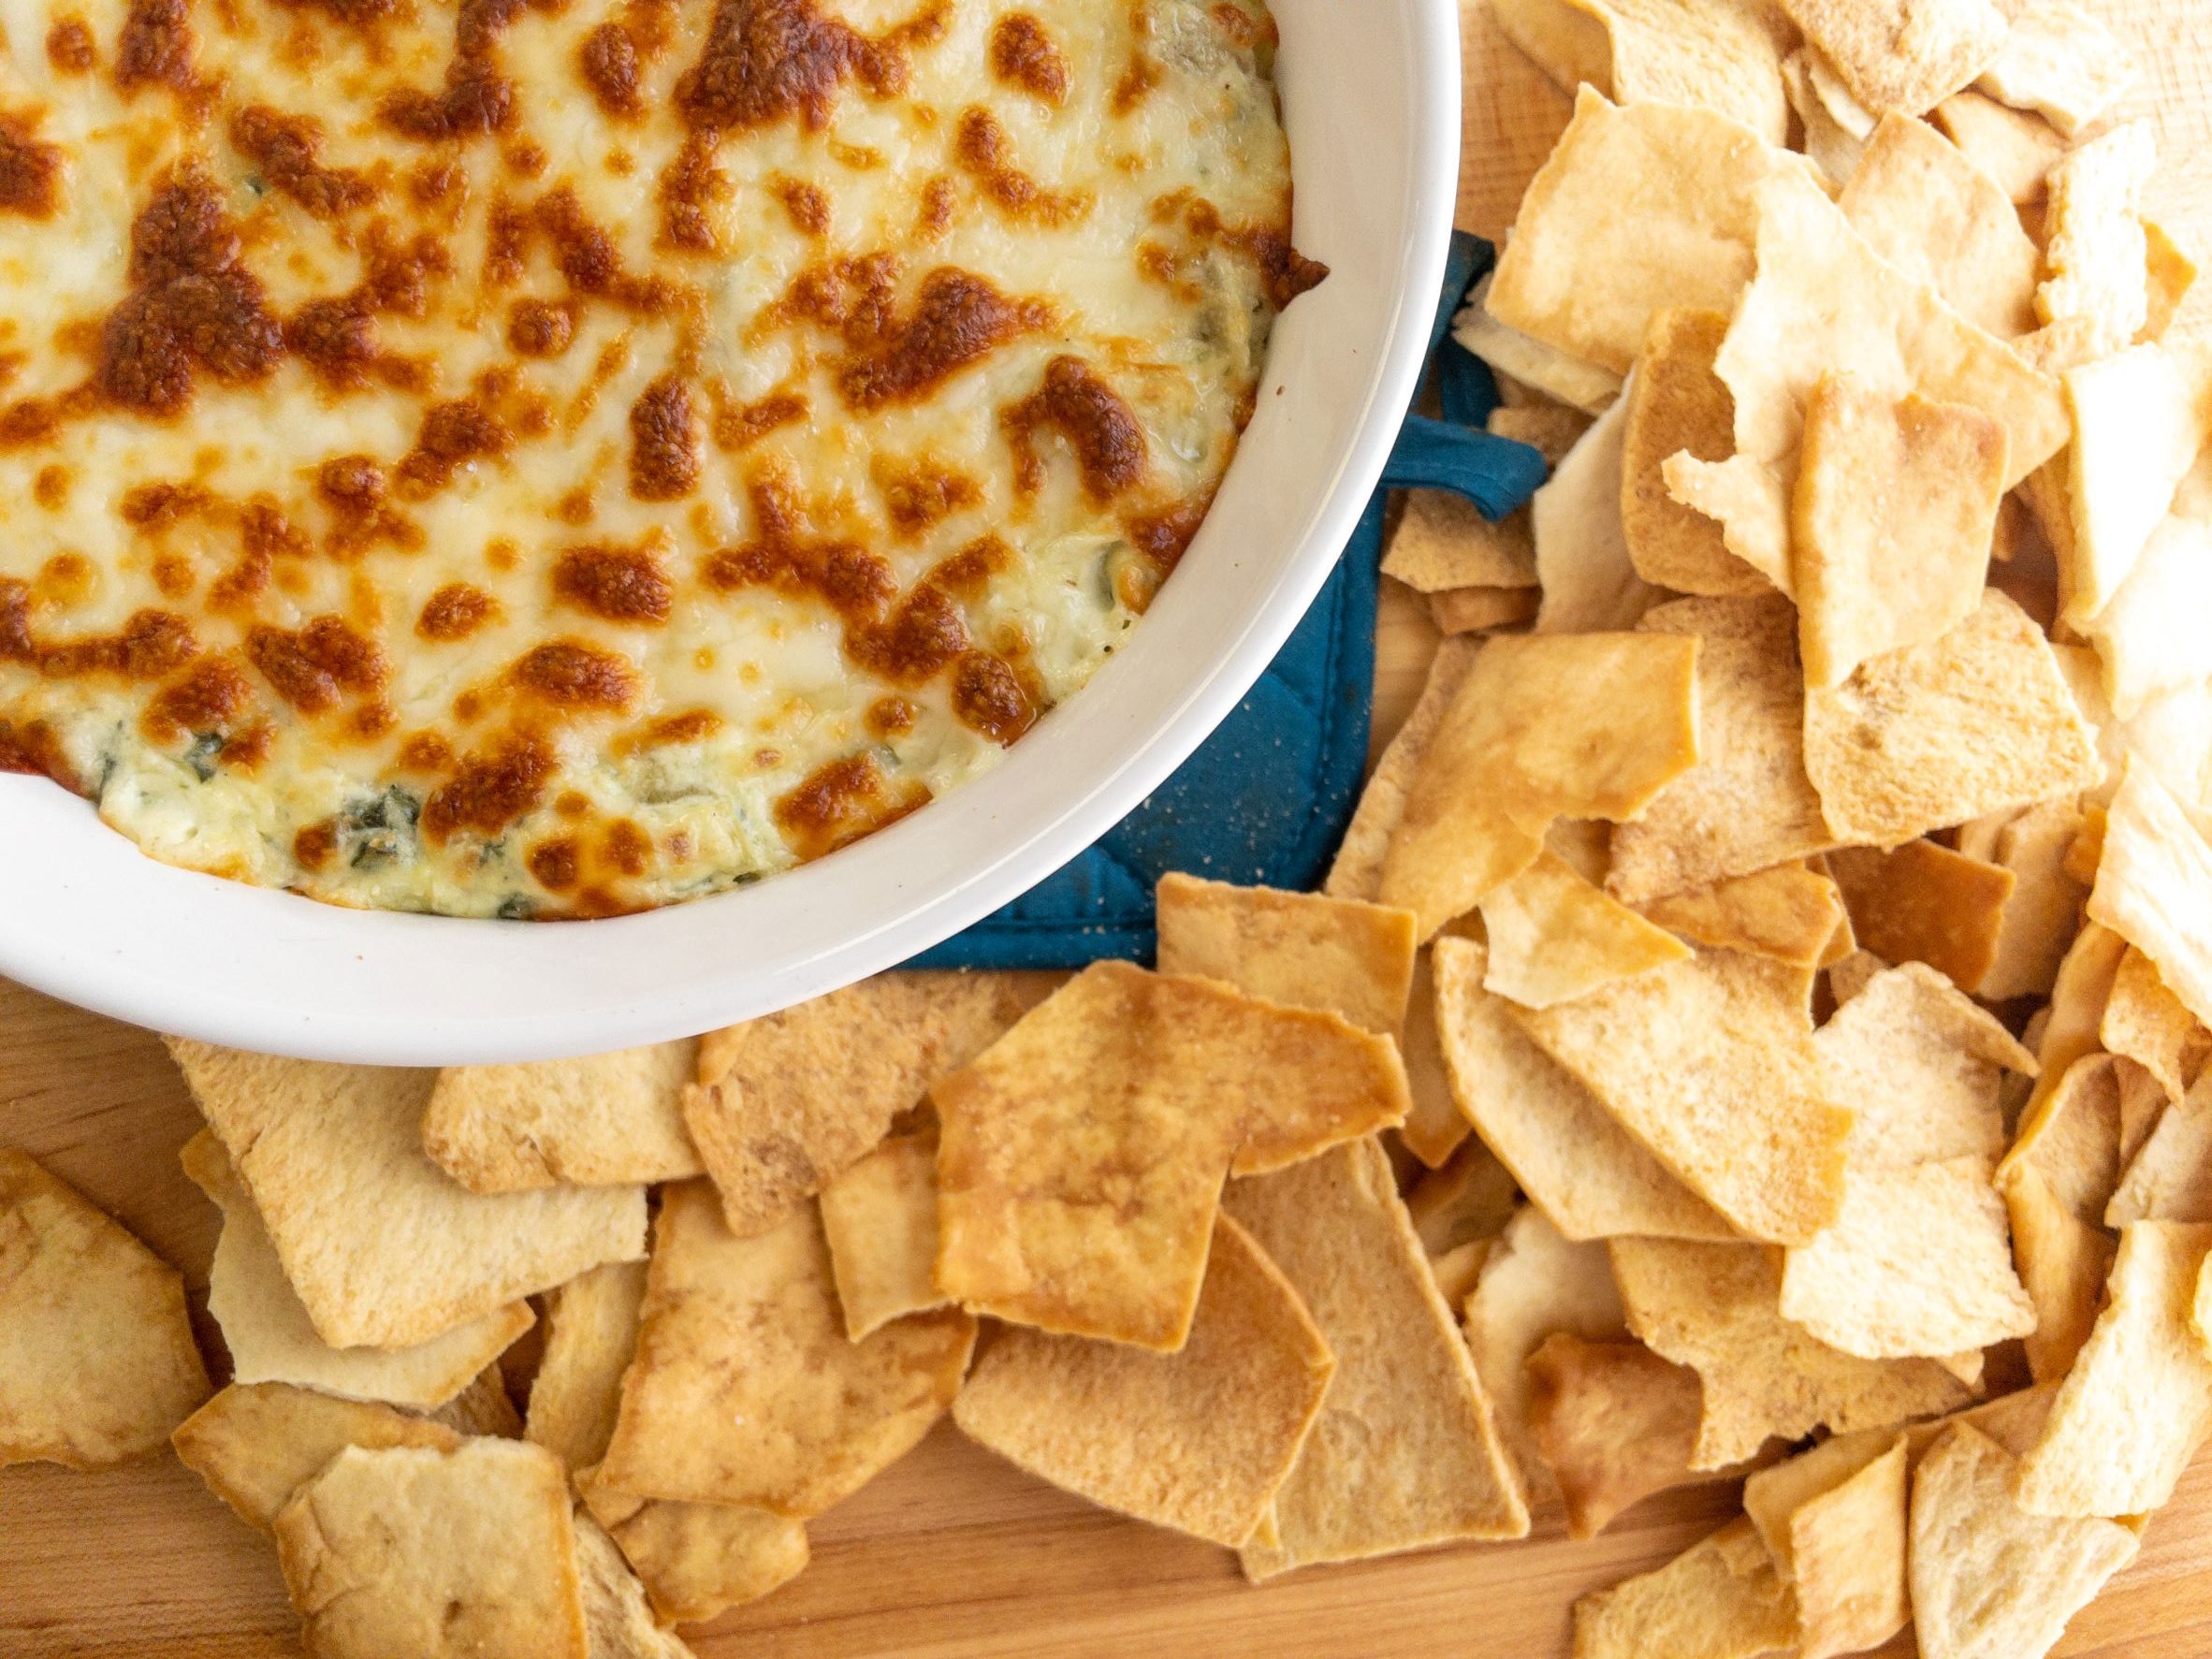
Cheese: Because this is mostly cheese, you want to use the good stuff. When melting cheese it is best to grate your own. Pre-grated cheese is covered in cellulose to prevent clumping in the bag. When you melt pre-grated cheese the cellulose prevents the cheese from melting properly. There’s your science lesson for the day…. But really we just want the cheese pull.

Just look at this

How to make THE BEST spinach and artichoke dip

In a medium sized pot over medium heat, melt the cream cheese until spreadable. Add in the sour cream, garlic, spinach, and artichoke hearts. Mix until thoroughly combined. Add in the parmesan, mozzarella, and red pepper flakes. Mix until all ingredients are combined and the cheese starts to melt. 

Immediately transfer to an oven safe pan and top with the rest of the mozzarella. 

Bake on 400 for 10 min and then broil 2-3 min until the cheese is bubbly. 

IT’S THAT EASY. Also please don’t serve this with tortilla chips…they break too easy and nobody wants that. 

Print

THE BEST Spinach & Artichoke Dip

Course Side Dish
Cuisine American
Keyword artichoke, easy, spinach dip, the best
Prep Time 15 minutes
Cook Time 30 minutes
Servings 6

Ingredients

  • 8 oz cream cheese
  • 1 clove garlic minced
  • ½ cup sour cream
  • 3 cups artichoke hearts chopped
  • 3 cups fresh spinach chopped
  • ½ cup parmesan grated
  • 1 cup mozzarella grated
  • ½ tsp red pepper flakes

Instructions

  • Preheat oven to 400°
  • In a pot over medium heat, melt the cream cheese until soft
  • Add the garlic and cook for 1 minute
  • Add in the sour cream and mix thoroughly
  • Add the spinach and artichoke hearts. Mix thoroughly.
  • Add parmesan, red pepper flakes, and half of the mozzarella
  • Salt to taste
  • Pour mixture in an oven safe pan and top with the rest of the mozzarella.
  • Bake in a 400° oven for 10 minutes
  • Broil until top is brown. About 2-3 minutes
  • Serve immediately with pita chips

Cozy Sausage Lentil Soup

This lentil soup has everything you could want in a cold weather meal. It just makes me want to curl up with a good book and a big bowl of this cozy sausage lentil soup. This soup is also GREAT for meal prep!

Lentils are one of the most underrated foods I can think of. They are versatile and a great source of plant based protein. I think the reason lentils are looked over is because people don’t know what to do with them. What are they anyway? Are lentils a bean? Are they a grain? Lentils are a legume, somewhat similar to a bean. They do not need to be soaked and cook somewhat quickly. 

Say it with me! Lentils are easy! 

If you don’t want to read on and on about this recipe you can jump to the recipe below. My feelings won’t be hurt too bad.

Jump to Recipe

How this all came about:

This sausage and lentil soup recipe came to me by accident. My husband and I had just moved into our first house and it was going to be a couple of days before they could come turn the gas on for us. Since we had a gas stove that meant no stove (and no hot shower, but that’s a different story). I had no idea what we were going to eat! I got out my crock pot and started grabbing stuff out of the fridge to throw together. Carrots, celery, and onion (a good base for any soup). Sausages, a couple cans of tomatoes, and a bag of lentils. I put all my ingredients in the crock pot and let it cook while I went to work. When I got home I was greeted by the most amazing smell. The crock pot worked its magic and created a fantastic lentil soup. 

This lentil soup has been a favorite in my home since then. It is very simple to make and is SO good. 

Some notes:

Lentils: I use regular brown lentils in mine, but you can use any variety you like. Lentils need to be washed thoroughly before cooking. 

Tomatoes: You can use canned tomatoes for this recipe HOWEVER fresh is always better. If you are using fresh, you need to remove the skins. Before you get your potato peeler out, here’s my hack for peeling tomatoes. Score the bottom of the tomato with an “X” and boil for 2 min. Once boiled, place in an ice bath or run under cold water. The skins will peel right off. 

Once your tomatoes are peeled (and cooled), cut them in half and remove ALL of the goop and seeds. 

Sausage: I usually get a red wine sausage for this soup. I recommend buying raw sausages (tip: the butcher’s counter at the grocery store usually has the best ones). You will want to remove the casing because it gets chewy in the soup. To remove the casing, score the side of your sausage lengthwise and peel the outer casing off. Cut the sausage into bite size pieces.

Bouquet Garni: This is fancy talk for a bunch of herbs tied together with string and cooked in the soup. As always, I recommend using fresh. Tie the herbs together with string to be removed later. If you don’t have string (because who has string in their kitchen?) then cut the herbs up and add them to the soup. If fresh herbs are not available to you, use a variety of your favorite dried ones! I usually use oregano, thyme, and rosemary. 

Cozy sausage lentil soup

Optional steps:

Once it’s done cooking I like to scoop some of the lentils out to blend. This will help to thicken the soup and give it that creamy texture we are looking for. 

You can omit the sausage and use veggie stock to make this recipe vegetarian! 

I like to add red pepper flakes to my soup at the end for some spice. This is totally optional but highly recommended.

Print

Sausage and Lentil Soup

Course Soup
Keyword easy, healthy, lentil, sausage, soup
Prep Time 15 minutes
Cook Time 1 hour 15 minutes
Servings 8

Ingredients

  • 3 tbsp olive oil
  • 4 carrots chopped
  • 4 celery stalks chopped
  • 1 onion diced
  • 3 andouille sausages
  • 5 tomatoes diced
  • 2 cups lentils
  • 4 cups chicken stock
  • 2 cups water
  • 3 tbsp herbs assorted
  • 4 bay leaves
  • 1 tsp red pepper flakes

Instructions

Prep:

  • Chop vegetables
  • If using fresh tomatoes peel them (instructions above)
  • Remove the casing from the sausage (instructions above) and cut into bit sized pieces

To make the soup:

  • In a large, heavy bottomed pot heat the olive oil then cook the carrots, onion, and celery until translucent.
  • Add the sausage and tomatoes. Cook for about 5-6 minutes. (This is the stage where we are building flavor so we are looking for brown on the sausage and pot)
  • Add the lentils, chicken stock, water, bay leaves, and 3 tablespoons of your favorite herbs.
  • Cover and simmer until the lentils are cooked about 45 min
  • Salt and pepper to taste

OPTIONAL:

  • Scoop out one cup of lentils and one cup of liquid and blend. Pour back into soup to thicken
  • Add red pepper flakes

Mind Blowing Carnitas

Alright you guys it’s time to get serious about pork butts.

  But seriously…

Pork butt/shoulder (they are the same) is one of the best cuts of the pig (sorry Wilbur). Everyone eats this cut (think any kind of pulled pork), but few make it at home. It’s a shame because IT’S SO EASY. The trick with these tough fatty pieces of meat is to braise them. Cooking pork butt for a long time on a low temperature is the best way to get tender, delicious, mind blowing carnitas.

I am a HUGE Mexican food fanatic. When I traveled to Mexico a couple years ago, I was blown away by the carnitas. Since returning, I have been trying to recreate the flavors I had there and let me tell ya…I think I got it.

If you don’t want to read on and on about this recipe you can jump to the recipe below. My feelings won’t be hurt too bad.

Jump to Recipe

The secret is orange juice.

You get the hint of sweetness and the acidity helps tenderize the meat. These carnitas just melt in your mouth and explode with flavor. The BEST thing…you make them in the crock pot (remember the whole braising concept? Crockpots are the life hack for braising). Who has time to babysit something in the oven all day? I don’t. These are great. You put everything in the crock pot in the morning and it’s ready for dinner. That’s a win in my book all day long. Plus these carnitas are great on everything. Tacos? YES. Quesadillas? YES. Cauli rice bowl with mango salsa? YES YES YES. Make a big batch and you have lunch for the whole week!

Mind blowing carnitas

Alright lets get started:

PORK BUTT: You will want to get about 3-4 pounds of pork butt or shoulder for this recipe. Trim off the extra large pieces of fat. TIP: Cut the pork into 4-5 chunks for extra flavor. Season the pork with your spice mix. This is a large cut of meat. Trust me, you NEED a lot of seasoning.

Chilis: While you can use canned green chilis in a pinch for this recipe, I do recommend using fresh chilis and fire roasting them for ultimate flavor.

Orange juice: Fresh squeezed (I get it in the produce section at the grocery store) is always the best, but you can use pre bottled juice too.

Put all your ingredients in the crock pot and cook on high for 8-10 hours. It’s as easy as that!

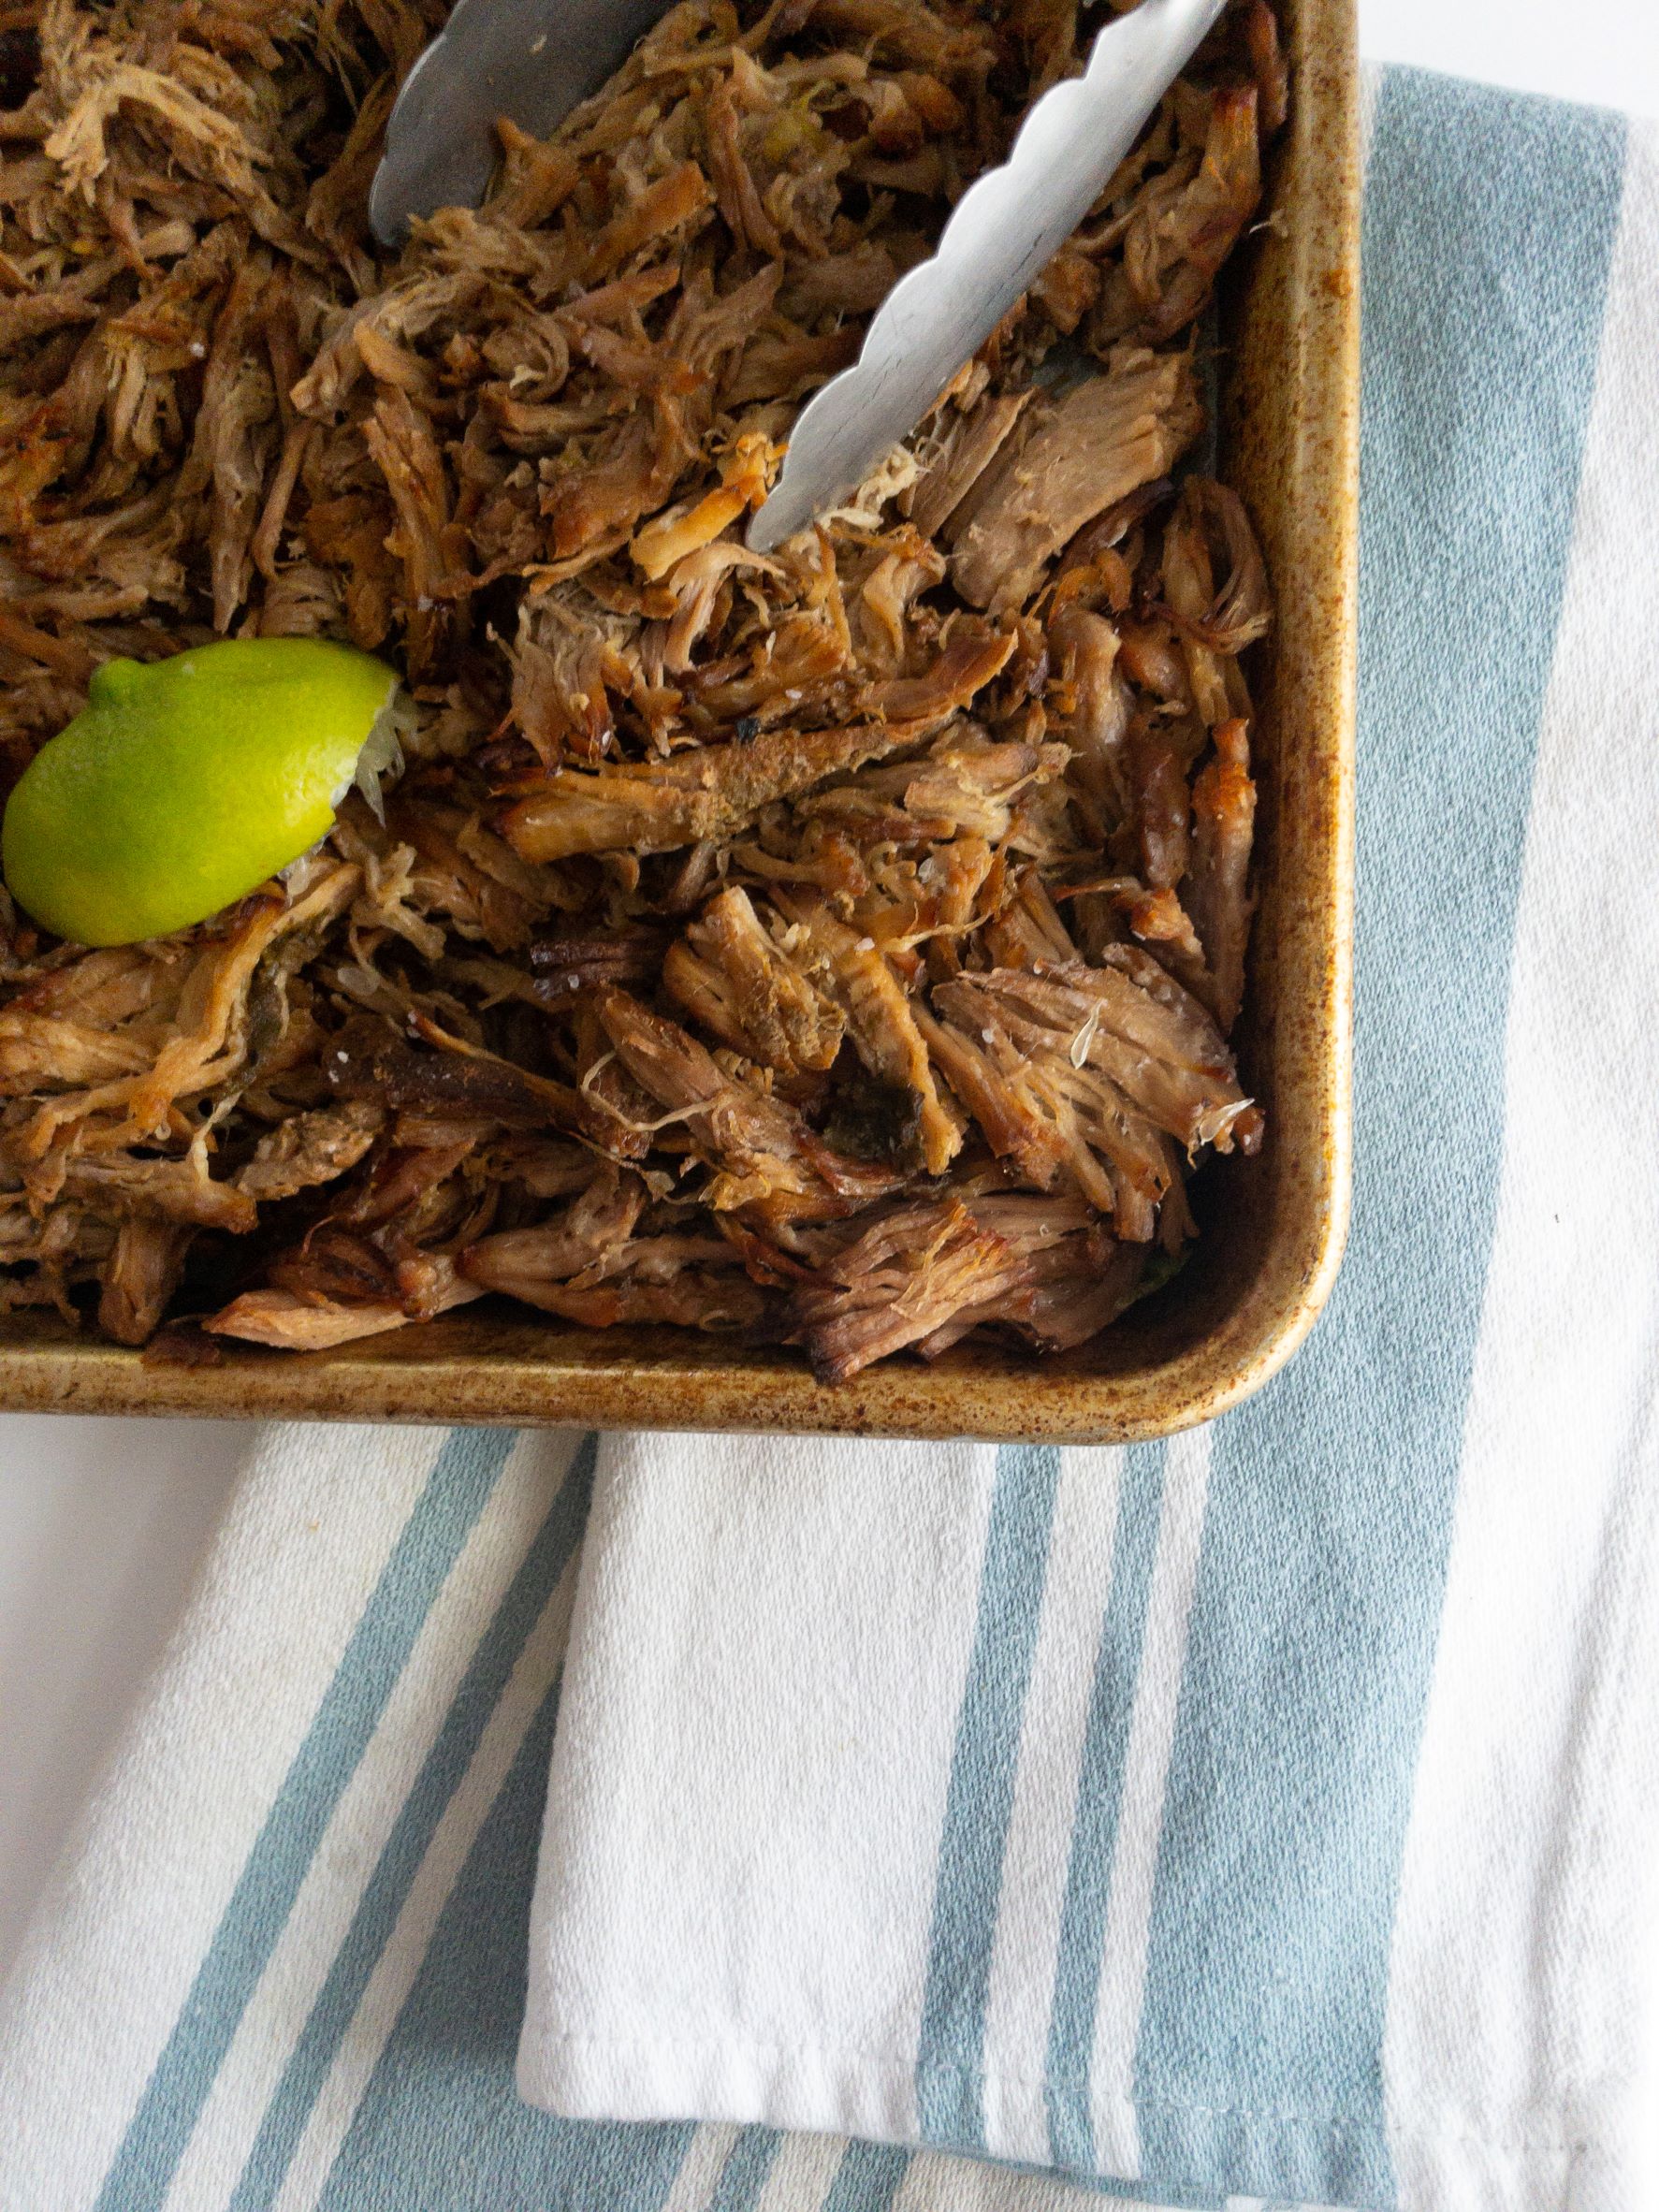
Once your pork is done, shred it (should shred VERY easily) and put it all on a baking sheet. Spoon some chilis and about a cup of your cooking liquid on top and broil for 5-6 min until you reach your desired amount of golden brown deliciousness. Squeeze the lime juice on top if desired, and serve them up however you like!  

Storing:

Your carnitas will store in the fridge for 4-5 days and freeze for up to 3 months. For reheating frozen carnitas I recommend using a heat safe bag and then heating up the carnitas (still in the bag) in a boiling pot of water. That way you don’t lose any of the moisture or flavor. Remember to heat to 165.

I seriously can’t believe how simple it is to make something THIS delicious. Enjoy!

Print

Mind Blowing Carnitas

Course Main Course
Cuisine Mexican
Keyword carnitas, easy, healthy
Prep Time 30 minutes
Cook Time 8 hours

Ingredients

  • 3-4 lbs pork butt
  • 2 limes
  • 12 oz orange juice
  • 4 oz green chilis

Spice Rub

  • 2 tbsp cumin
  • 1 tbsp chili powder
  • 2 tbsp paprika
  • 1 tbsp onion powder
  • 3 tbsp salt

Instructions

  • If desired, trim the pork butt to remove large chunks of fat.
  • Cut pork into 5-6 evenly sized chunks
  • Season the pork with the spice rub
  • Put the pork, orange juice, green chilis, and juice from 1 lime in a crock pot.
  • Cook on high for 8-10 hours.
  • Shred pork and spread on a baking sheet.
  • Squeeze a lime over the top and broil for 4-5 minutes or until it reaches desired color.

Spicy Shrimp Rice Bowl

Are you ready for the ULTIMATE fresh vibes dinner? Introducing the spicy shrimp rice bowl. It has it all. Spicy, crunchy, sweet, creamy, and oh so delicious. These are super quick to make…like done in 30 minutes. If that’s not a major week night win I don’t know what is. Needless to say, these are a favorite in my house.

Some Notes: 

Rice: Use your fav rice. White, brown, cauli. It all works! 

Cabbage: This is a must. I used purple for the pop of color, but you can use green or even a mix. This gives the bowl some texture and is oh so delicious with the crema.

Shrimp: They cook really fast so don’t make them until the end. 

TIP: I use raw shrimp rather than precooked. I think they have a better texture and are less fishy tasting. 

The shrimp get cooked in a spicy, garlicky oil for maximum flavor. Heat up your oil for about 20 seconds, then add the red pepper flakes and garlic. When you are cooking the shrimp you have to pay close attention because these bad boys will go from beautifully cooked to rubber really quick. The great thing about shrimp is they turn pink and opaque when they are done cooking so it’s really easy to have perfectly cooked shrimp.

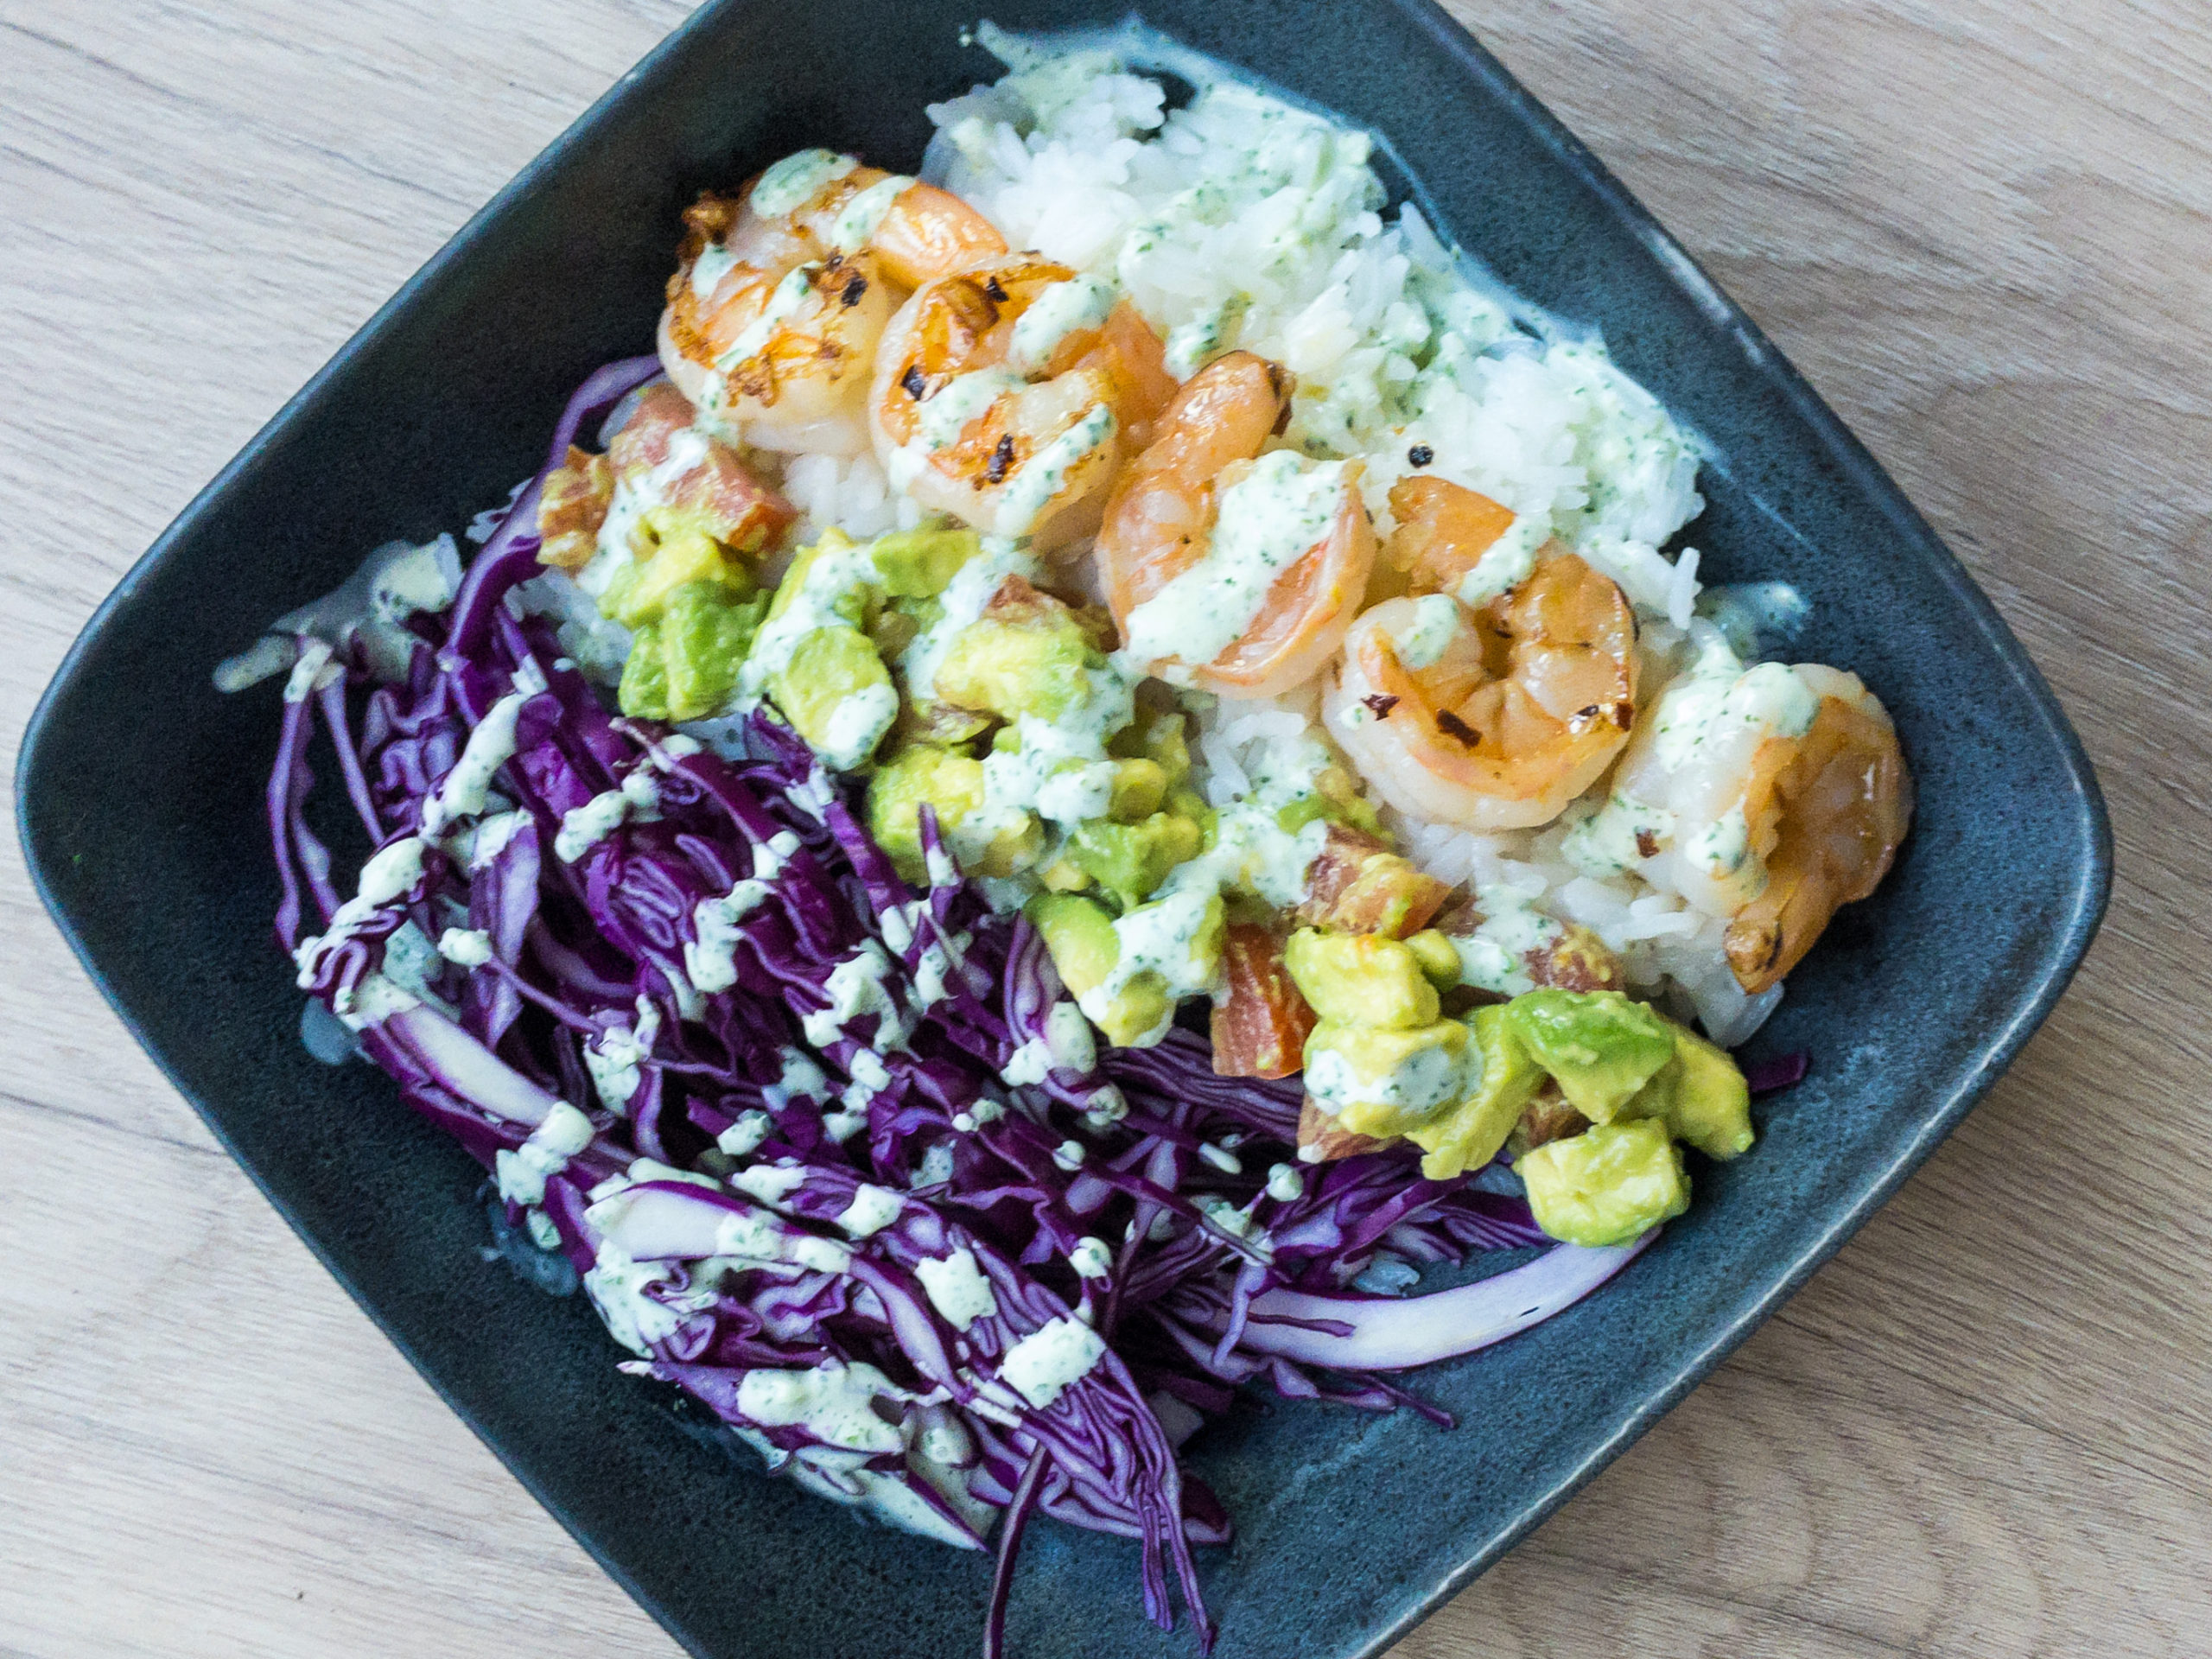
spicy shrimp rice bowl

Avocado: “You can have too much avocado,” said no one ever. Pile on the avocado… you deserve it. 

Crema: Forget about the cherry on top this crema is AMAZING on everything (disclaimer I have not tried on ice cream… probably not good, but to each their own). This crema ties the whole bowl together. Again, super easy to make just throw all the ingredients in a blender/ food processor/ lawn mower… I don’t care, just get it creamy and smooth. It is amazing, I promise. 

Not required but here are some extras that would be FANTASTIC in this bowl: 

Green onions 

Pineapple

Edamame beans 

Cashews 

Crispy onions 

Mango Salsa

NOW THE BEST PART- Assemble your spicy shrimp rice bowl!

Step 1: Put rice in a bowl 

Step 2: Add cabbage

Step 3: Scoop on avocado (if your avocado mountain doesn’t put Everest to shame there isn’t enough) 

Step 4: Add shrimp

Step 5: Drizzle (or if you are like me…ladle that crema deliciousness) on top of your rice bowl

Step 6: Die and go to heaven

Hope you enjoy! 

Print

Spicy Shrimp Rice Bowl

Course Main Course
Keyword avocado, easy, fresh, rice bowl, shrimp

Ingredients

  • ½ cabbage thinly sliced
  • cooked Rice

For the shrimp

  • 1 lb shrimp
  • 2 tbsp olive oil
  • 1 clove garlic minced
  • ½ tsp red pepper flakes

For the avocado salsa

  • 1 avocado diced
  • 2 tomatoes diced
  • salt to taste

For the crema

  • ½ cup sour cream
  • 1 lime
  • 1 cilantro bunch
  • 1 tbsp honey
  • 1 tsp salt
  • ¼ cup water

Instructions

  • Slice the cabbage and set aside

Make the avocado salsa

  • Put the diced tomatoes and avocado in a small bowl. Mix and salt to taste.

Make the crema

  • Add all of the ingredients into a food processor or blender
  • Blend until smooth
  • Taste and add more salt if needed

Make the shrimp

  • Clean the shrimp and rinse
  • In a medium sized pan heat 2 tbsp. of olive oil over medium heat.
  • Add the red pepper flakes and garlic. Cook until aromatic (about 30 seconds)
  • Add the shrimp and stir occasionally until cooked through. About 3-5 min.

To assemble

  • Assemble your shrimp, avocado salsa, and cabbage on top of cooked rice
  • Drizzle with crema
  • ENJOY!

Summertime Mango and Jalapeño Salsa

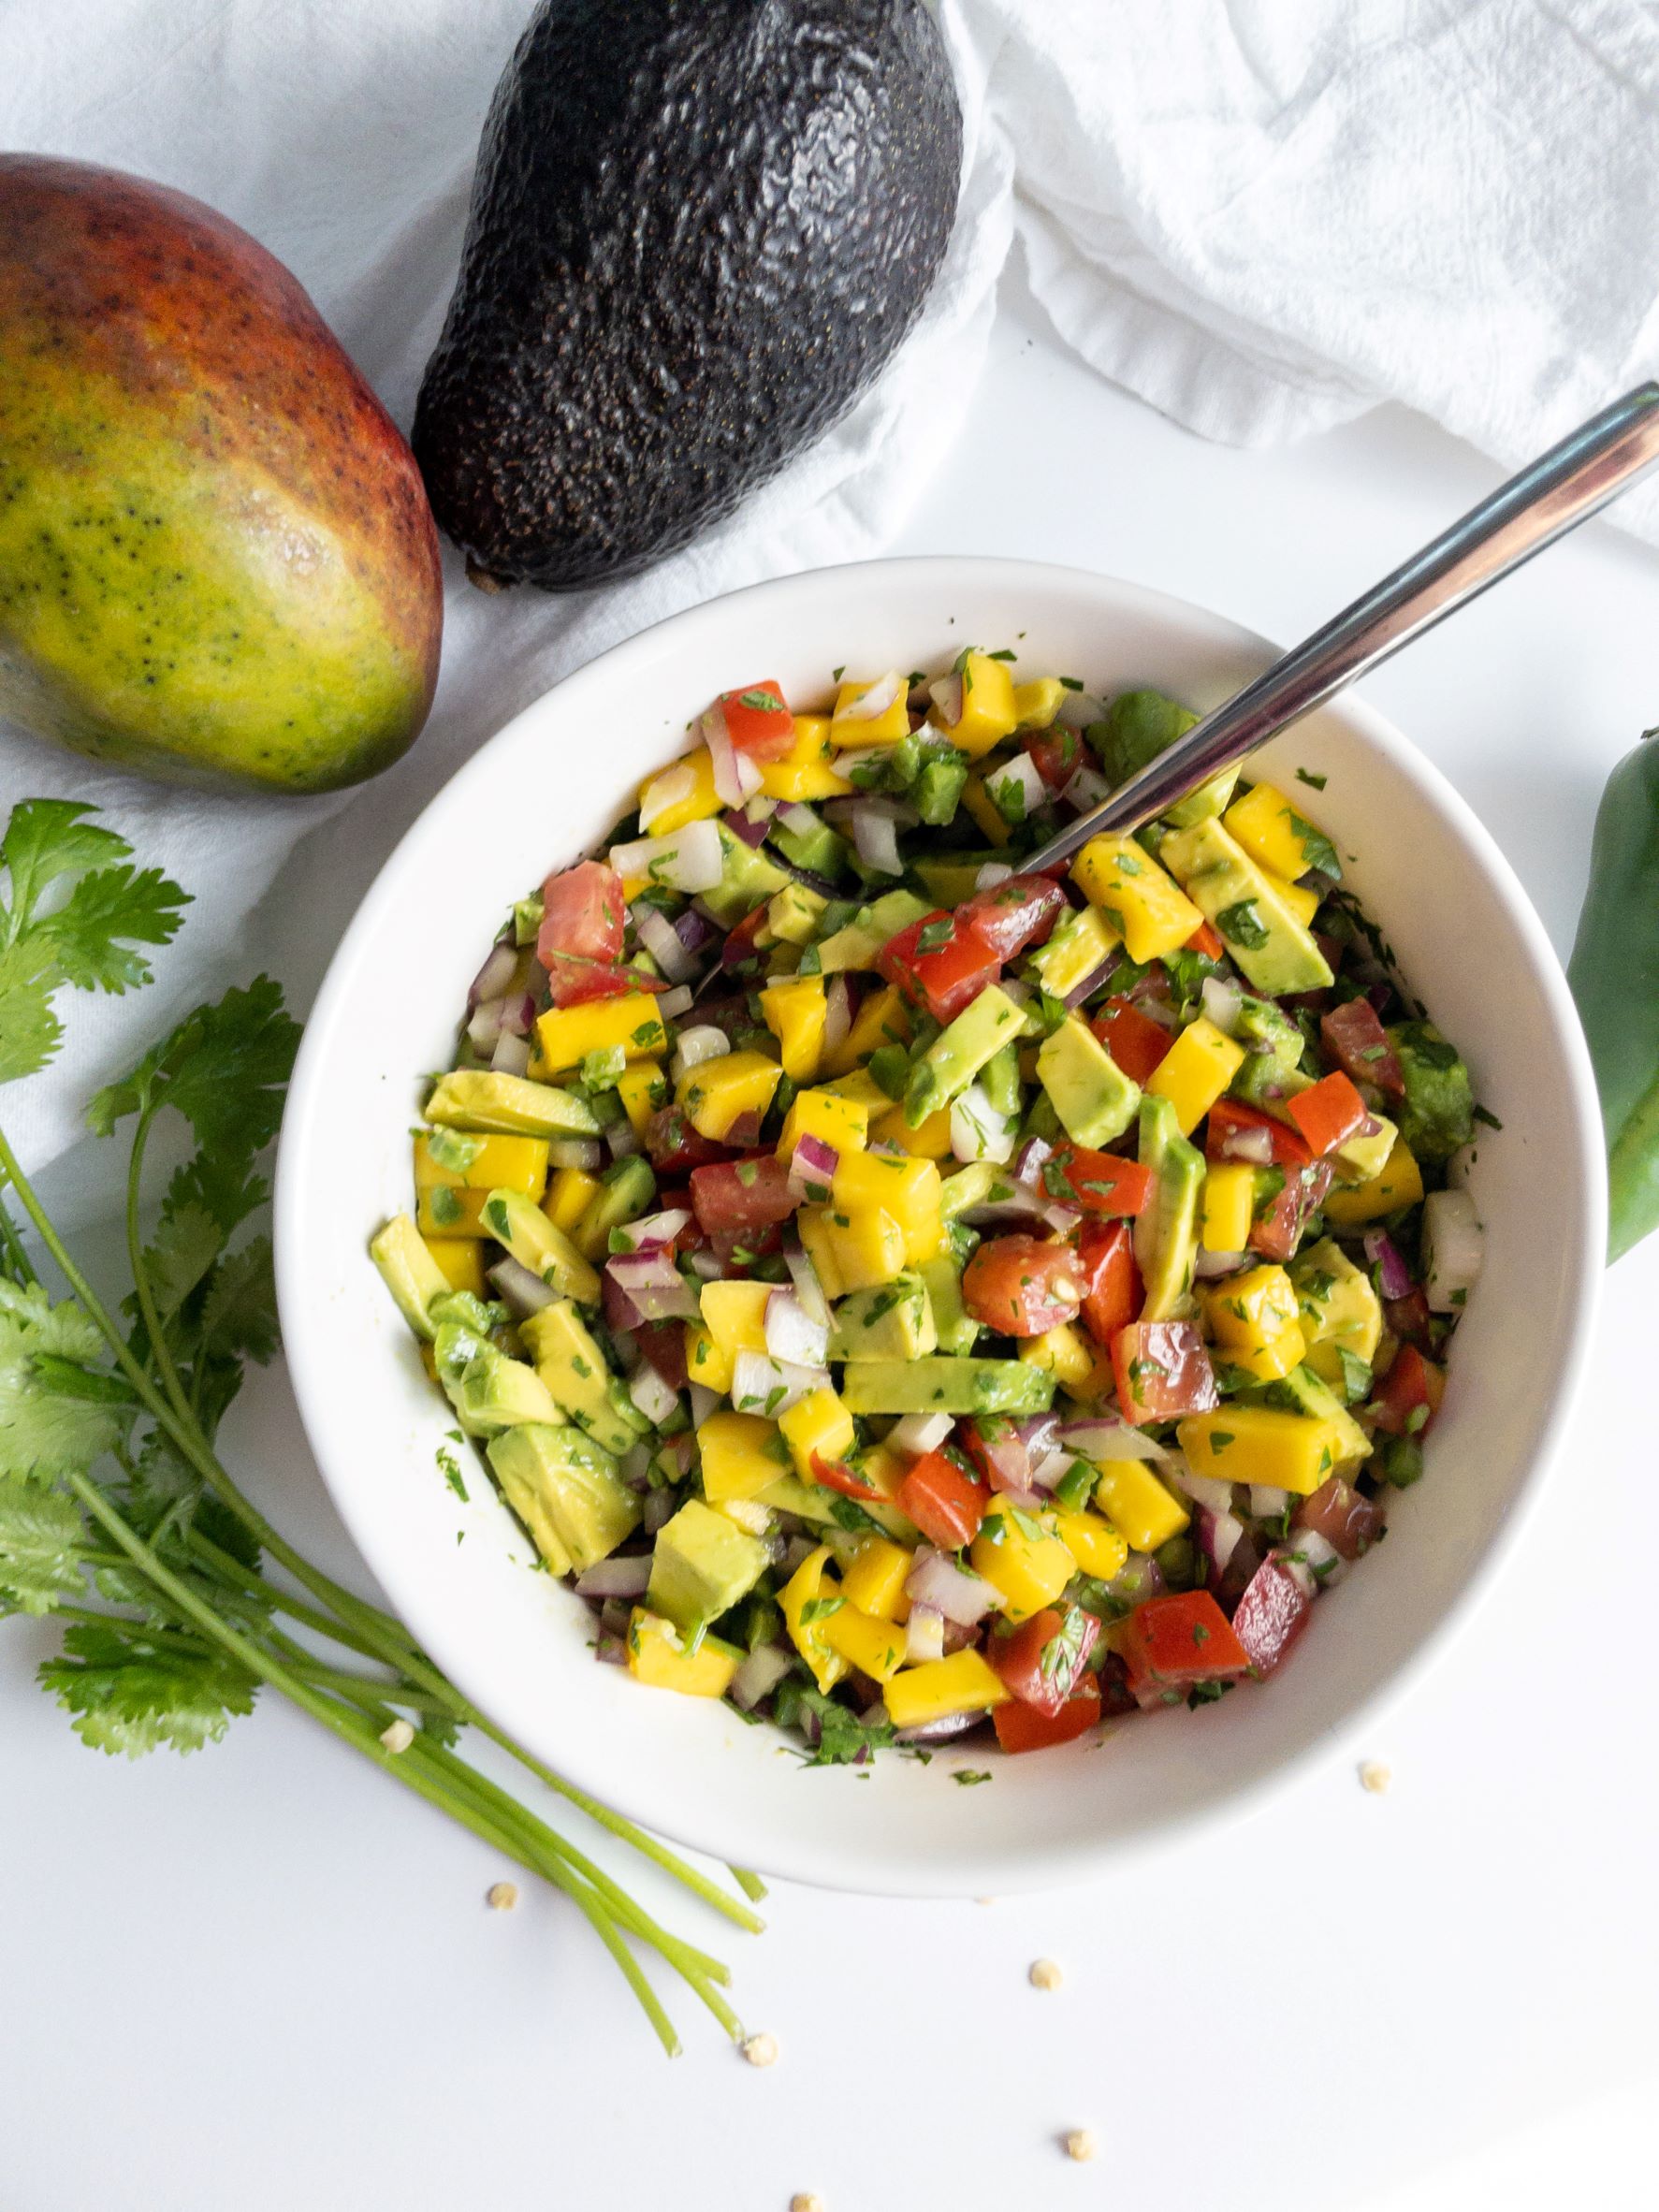
Mangos… ahh the most delicious fruit. I remember when I first tried mangos I told my mom she would never have to buy me Christmas presents again because I just wanted mangos (true story). I seem to be able to eat endless amounts of this elite fruit. When I went to Thailand I ate pretty much nothing but mangoes for two weeks straight because they were SO good. I was a little spoiled by those mangoes, so I have to wait for them to be PERFECT to eat them here in UT… August is the month for mangoes, my friends, and I am LOVING it. This mango salsa is the best way to get mangoes on your dinner plate.

This is the epitome of summer right here. This salsa has everything you could want in it. A lil’ sweet, a lil’ tangy, a lil’ spicy. Great on chips, fish, grilled chicken, or you could just eat it with a spoon. This salsa will add a little bit of paradise to anything you put it on.

Jump to Recipe

Some Notes:

No tricks for this one other than making sure your ingredients are fresh and ripe. TIP: You can tell if a mango is ripe if it is just a lil’ bit soft when you squeeze it (think like peaches or avocados).

You will want to take the seeds out of your tomatoes. This will help prevent your salsa from becoming too watery. To do this, cut the tomatoes in half and scoop out all the seeds and goop.

To be SPICY or not to be SPICY

If you want your salsa to have a lil’ bit more kick you can add another jalapeno. If you are going for more mild salsa, cut the white spongy stuff off of the jalapeno and make sure there are no seeds (that’s where all the heat is). Then you can have the flavor of jalapeno without all the face melting. TIP: wash your hands very well after cutting jalapenos and whatever you do, DO NOT TOUCH YOUR EYES! …I learned that lesson the hard way, and it’s not pretty.

How to make Mango Salsa

Dice all your ingredients up, put them in a bowl with salt and lime juice, and YOU ARE DONE. Super easy and seriously delicious.

Pro tip: This mango salsa goes GREAT with my carnitas.

Storing: Store in an airtight container and refrigerate for up to 5 days.

ENJOY!

Print

Mango Salsa

Course Side Dish
Keyword easy, jalapeno, mango, salsa
Prep Time 15 minutes

Ingredients

  • 1 Mango Diced
  • 1 Avodaco Diced
  • ½ Red onion Diced
  • 2 Tomatoes Diced
  • 1 Jalapeño Diced
  • 1 Cilantro bunch Chopped
  • 1 Lime
  • Salt

Instructions

  • Dice the mango, avocado, onion, jalapeno, and tomatoes and put in a medium sized mixing bowl
  • Stir and add cilantro, lime and salt.
  • Stir and taste. Add more salt if needed.
  • Enjoy!

Ridiculously Easy Lemon Dill Salmon

I would argue that some of the best food I’ve ever eaten has less than 4 ingredients in it. This salmon 100% falls in that category. Oven salmon is easy to make, creates a minimal amount of dirty dishes, and just melts in your mouth (can I get an amen). You get the perfect amount of zing from the lemon, and the herby dill just brings this dish to happy land. Just in case that wasn’t enough to convince you this is the best dish ever, it’s ready in under 30 minutes… Yes you read that right, less than 30 minutes. Is your mind blown yet? 

Jump to Recipe


When it comes to cooking a fish I opt for the less is more approach. Fish is pretty delicate and anything too heavy or strong can weigh it down. Fish done right is amazing. Fish done wrong might as well be cat food. The problem people usually have with fish is overcooking. Overcooked fish is rubbery, sticky, and in my opinion, has a fishier taste. Beautifully cooked fish melts in your mouth and has a light, fresh flavor. DO NOT RUIN YOUR SALMON BY OVERCOOKING IT. I have cooked salmon in the oven time and time again. Here is my FOOLPROOF recipe for the most delicious fish you will ever eat. 

Some Notes:

Salmon:

ONLY get enough salmon to feed everyone. While you can reheat salmon it’s not recommended… Why would you let your microwave wreak havoc on your beautiful cut of fish? Salmon is best when it is fresh. I usually get skin on, but whatever floats your boat when it comes to picking your cut of salmon. TIP: The skin comes off very easy after being cooked. I prefer this method to cutting it off myself. If you do somehow end up with leftover salmon, it can be flaked and put on a salad (seriously so good).

Dill:

While I recommend using fresh dill, you can use dried if fresh is not available.

How to make oven salmon

Measurements for this salmon are a little bit difficult to quantify so I have taken pictures of each stage so you can see what to do. Ready?

Step 1:

Prep your salmon. Run your fingers down the center of the cut and feel for any leftover bones (definitely don’t want to eat those)

Step 2:

Dry the fish. I just pat it down with a paper towel. This helps get rid of some of the fishiness.

Step 3:

Lemon juice. For this size of salmon I used half a lemon squeezed over top. If you use a bigger cut you will want to use the whole lemon.

Step 4:

Salt. FISH IS DELICATE. While you do need to salt it, don’t go crazy.

Step 5:

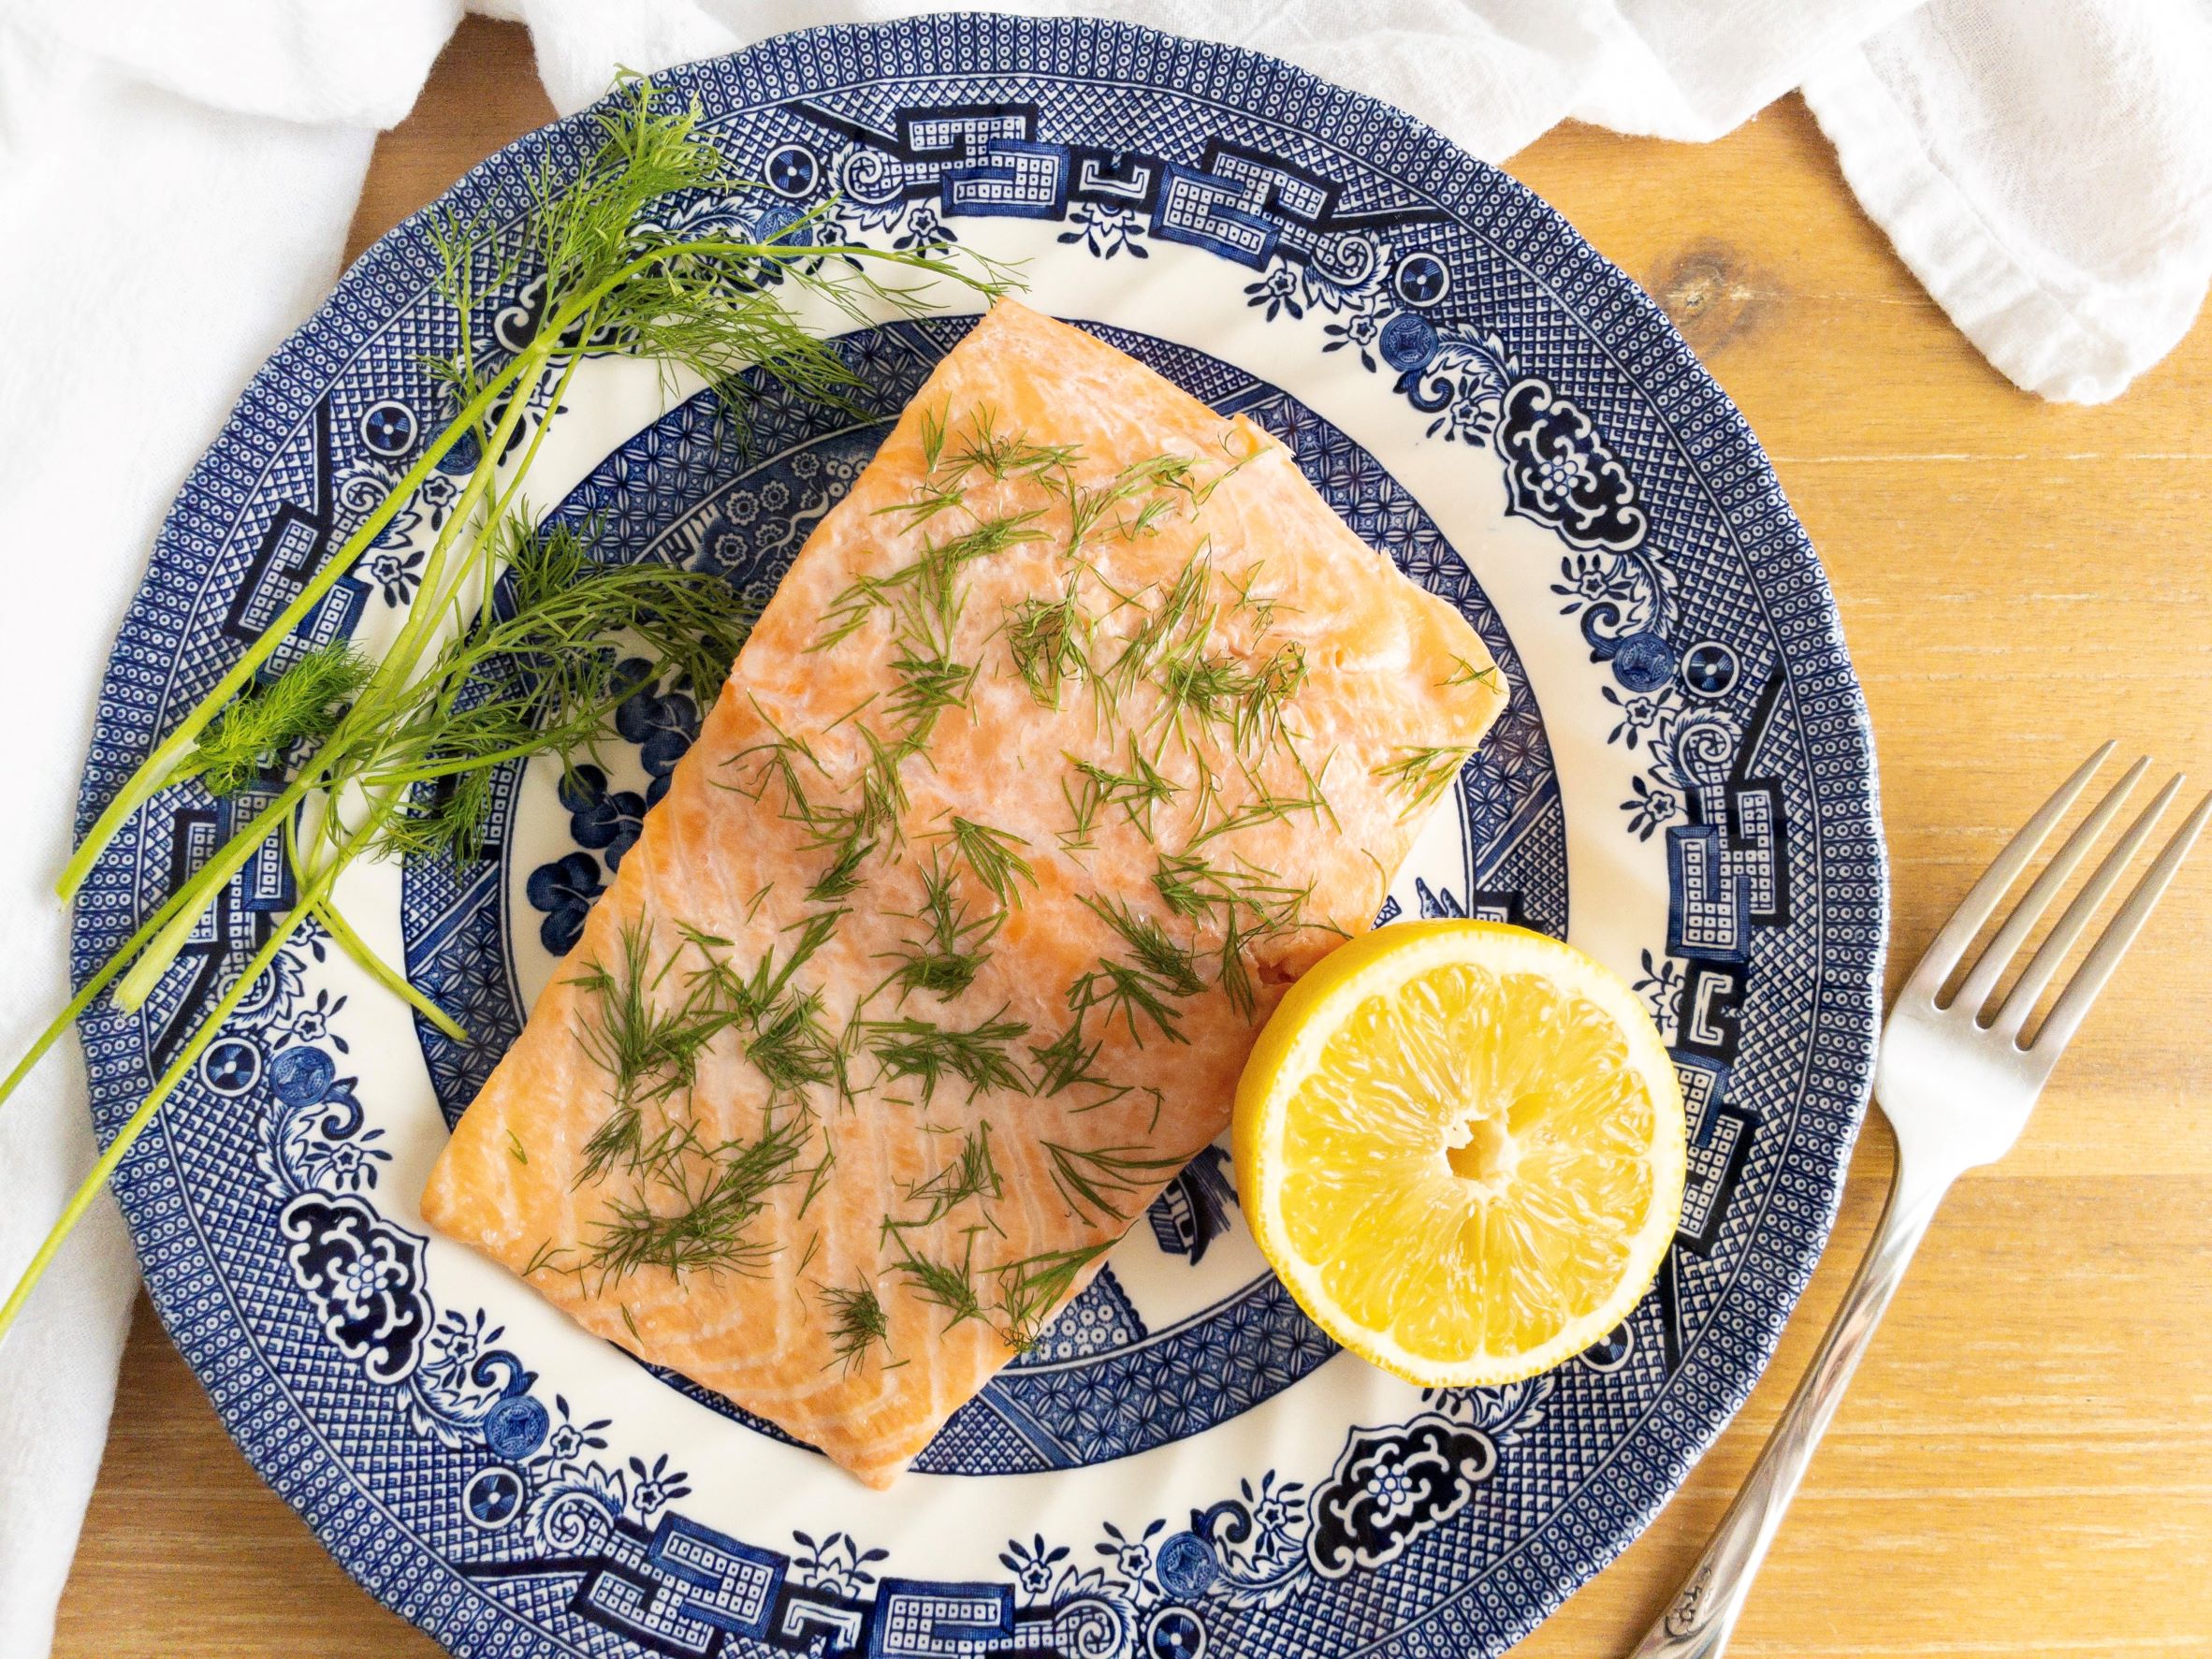
Dill. Give it a good coating of dill like so:

Step 6:

Cook at 325 degrees Fahrenheit for about 12-15 minutes depending on how firm you like your salmon. NOTE: IF you are using a larger cut you may need to cook for closer to 20 min.

Step 7:

Optional, but I squeeze more lemon on top.


Was that simple enough? Seriously delicious salmon in under 30 min.

Print

Easy Lemon Dill Salmon

Course Main Course
Keyword dinner, easy, gluten free, healthy
Servings 2

Ingredients

  • 12 oz Salmon
  • 1 Lemon
  • 1 bunch Dill
  • ¼ tsp Salt

Instructions

  • Preheat oven to 325 degrees Fahrenheit.
  • Check salmon for bones.
  • Salt evenly.
  • Squeeze lemon on top.
  • Spread dill evenly.
  • Bake for 12-15 minutes for small cuts or 15-20 minutes for larger cuts.


Creamy Cajun Shrimp Pasta

Is there anything better than pasta? The answer to that is no. When I think of the world’s best pasta I always think of THIS Cajun shrimp pasta. It’s the perfect balance of creamy, smoky, and spicy that keeps you coming back for more. It is bursting at the seams with flavor! This is also super easy to make for meal prep for the whole week! If that’s not a win-win I don’t know what is.

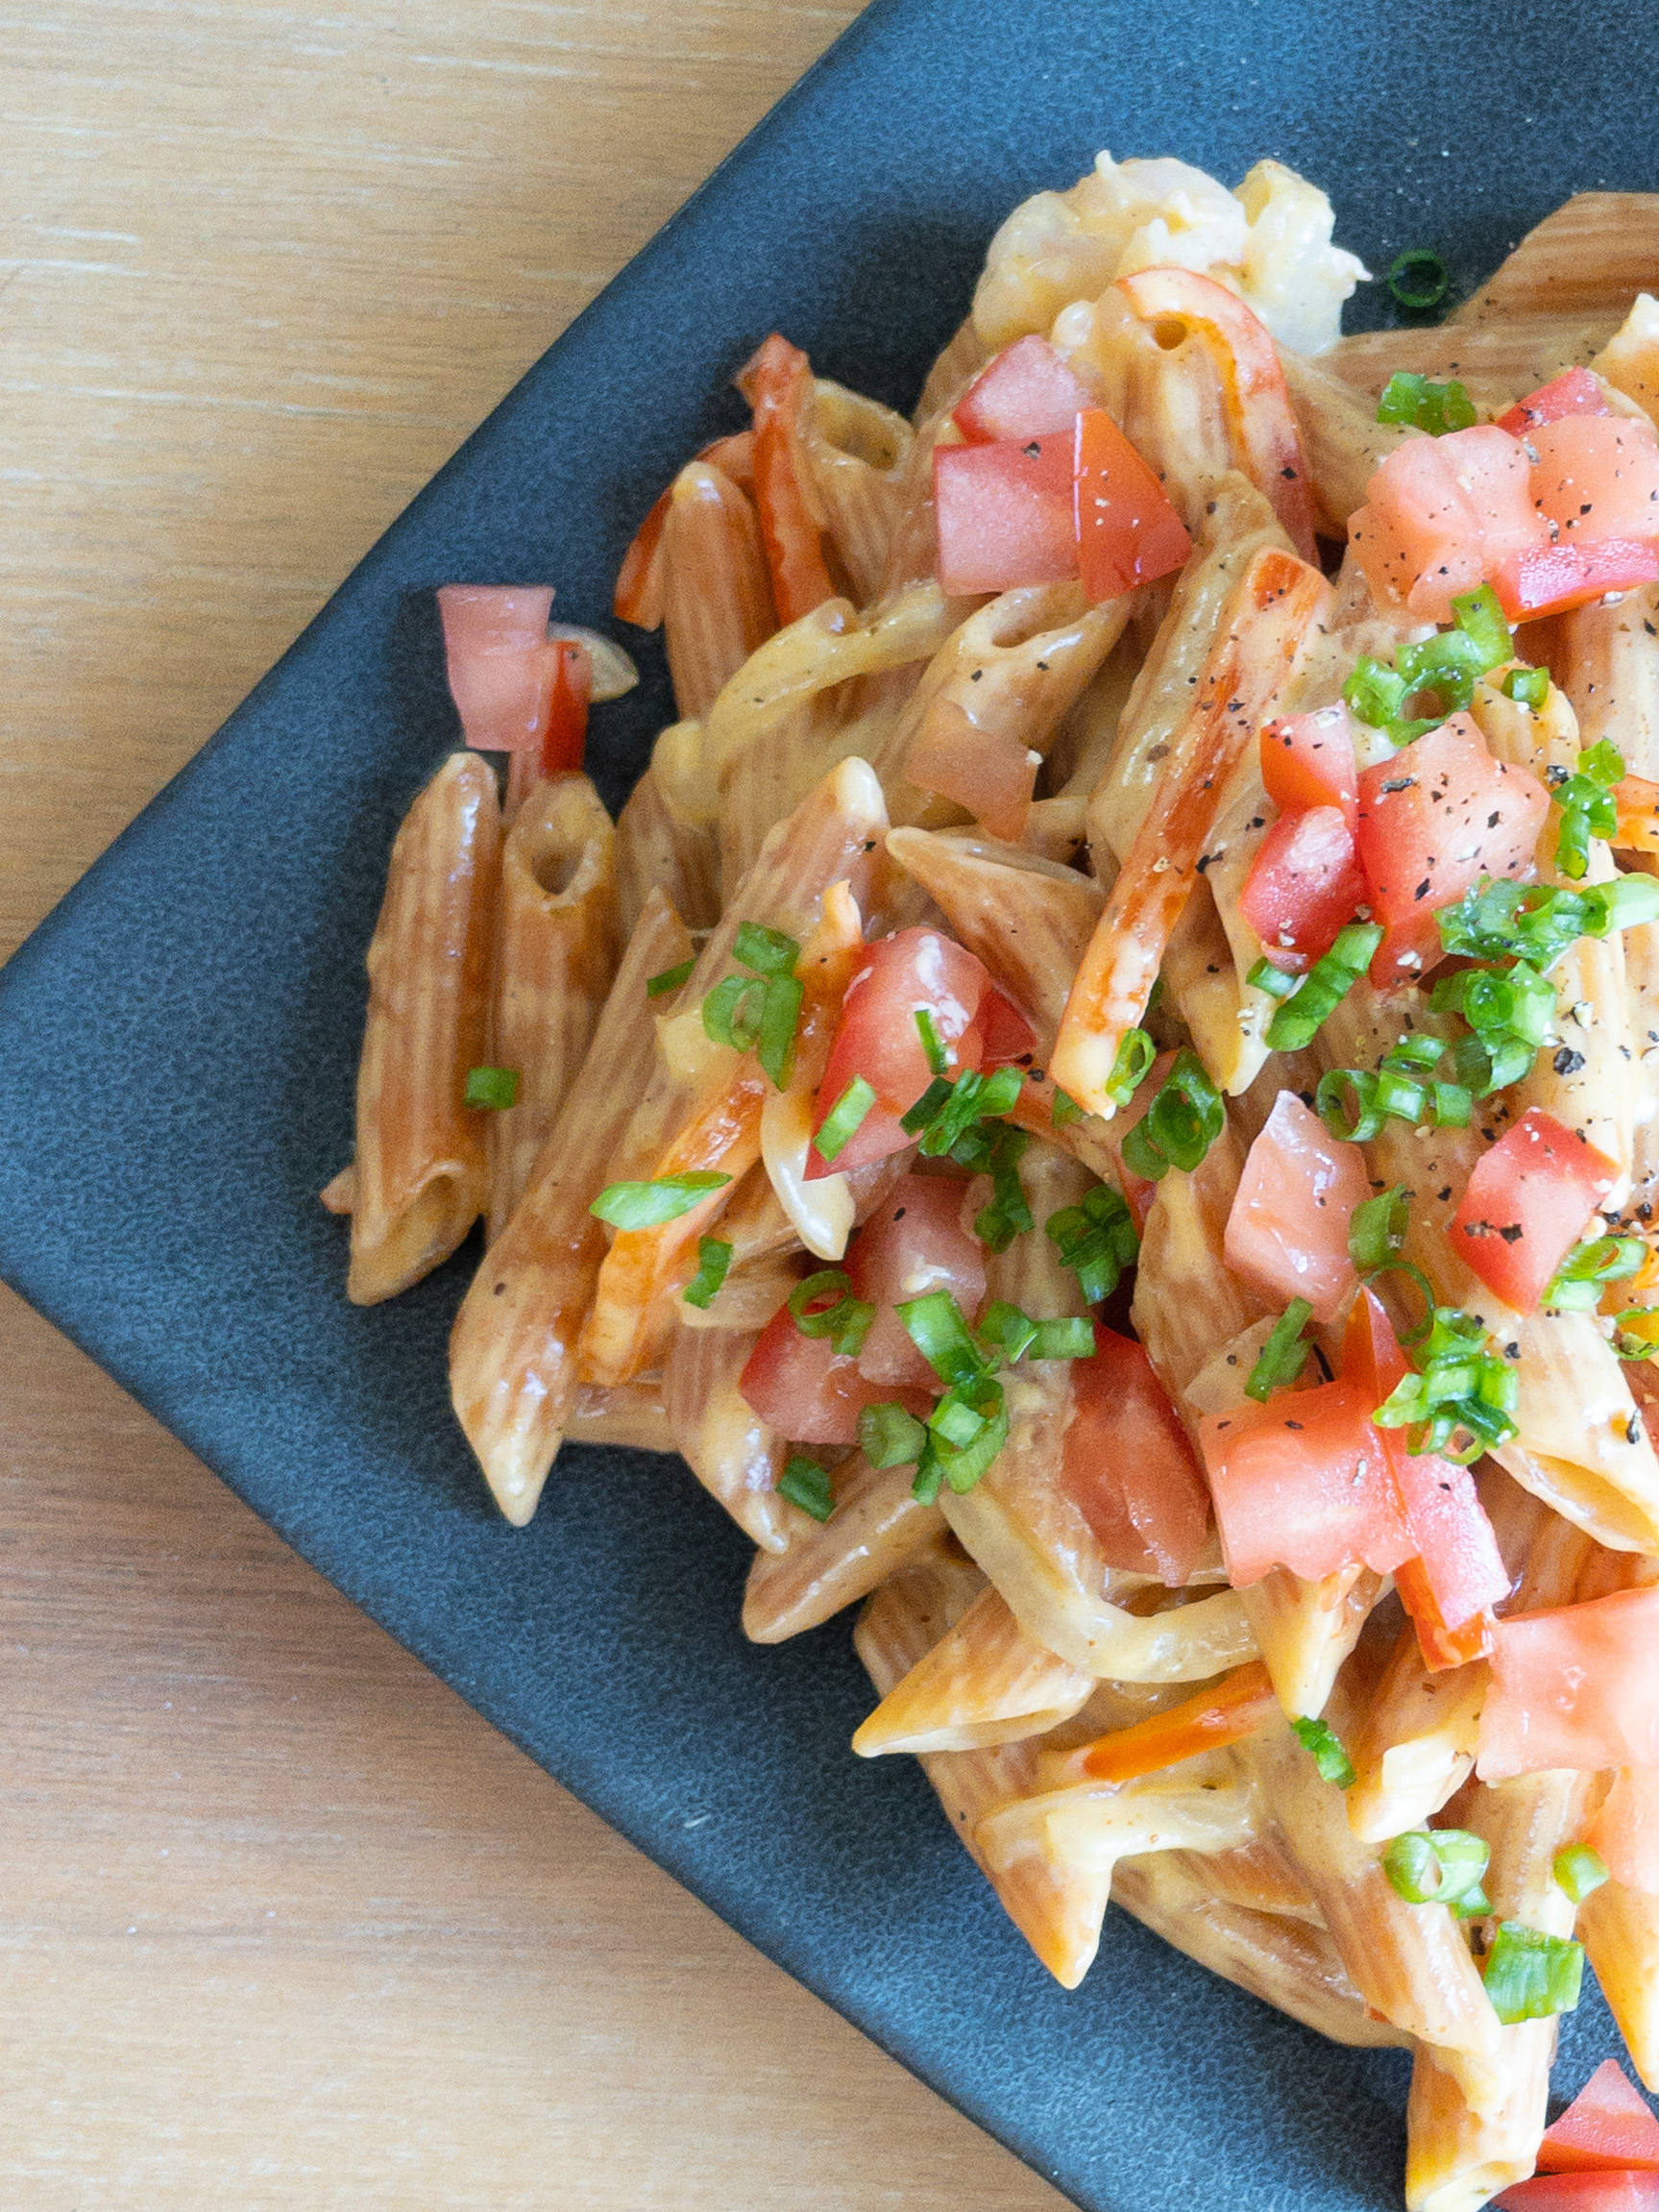
I mean just look at this… Doesn’t it just make you say give me a fork?

Jump to Recipe

This pasta is seriously so simple to make AND it is ready in less than 45 min. We all know that’s a major weeknight win.

Some notes: 

Pasta: This Cajun sauce works great on any pasta! Fettuccine, penne, or just whatever is lurking in the back of your pantry (I’m looking at you elbow pasta). This would even be great on zoodles. TIP: I use red lentil pasta for mine. 

Cajun seasoning: The Cajun seasoning is really the star of the show here. Pick one you like! Some are more spicy than others. I use a blend with no salt in it. If you pick a salted blend I recommend using half the amount of seasoning and adding more at the end if needed. Don’t want over salted food here.

Protein: You can substitute shrimp for really any protein you would like. You could use sausage or even grilled chicken in this pasta. I am a seafood fanatic so I use shrimp. TIP: Use raw shrimp rather than precooked. I think they have a better flavor and texture. Plus, then they don’t overcook in the pasta.

Garnish: Top it all off with some diced tomatoes, green onions, and black pepper. They add the perfect amount of freshness to the dish. 

How to make Cajun Shrimp Pasta

PREP:

Prep is extremely important. I believe that half the battle of cooking well is having ingredients prepped.

-Mince 1 clove of garlic.

-Slice 1 onion and 1 red bell pepper into THIN slices.

-Measure out flour.

-Dice 1 tomato.

-Thinly slice green onions.

TIP: Have all ingredients close to your cooking area.

Put your water on to boil for your pasta! Make sure to salt the water (a lot more than you think) so your pasta isn’t bland. 

Instructions:

You will want to pick a pot/deep pan that is large enough to hold all of your cooked pasta.

Over medium-low melt the butter and add garlic and Cajun seasoning.

Cook until fragrant (about 1 minute). The reason we do this is so the butter can absorb the flavor from the seasonings and carry it throughout the dish.

Turn heat up to medium and add in the peppers and onions.

Saute the veggies for about 7 min. We are going for fork tender peppers and slightly caramelized onions.

Once the veggies are done, add the flour and mix until it forms a paste. Let it cook for about a minute to get rid of the raw flour taste.

Add the chicken stock 1/2 a cup at a time. It is very important that you mix really good here so you don’t end up with lumpy sauce… that’s no good. TIP: I find that turning the heat down a little bit for this step helps me get lumps out.

Add the cream all at once and mix until smooth. 

Add cooked pasta.

TIP: If my sauce is a little thick I’ll add some pasta water. Stir until the pasta is completely coated. 

Add shrimp and cook while stirring occasionally until they are pink and no longer translucent, about 3-5 min.

Salt and pepper as needed. TIP: I usually add a splash of Tabasco to add some spice, but this is completely optional.

Garnish with tomatoes, green onions, and Old Bay seasoning.

ENJOY!

Print

Creamy Cajun Shrimp Pasta

Course Main Course
Keyword dinner, easy, pasta
Prep Time 10 minutes
Cook Time 35 minutes
Servings 6 People

Ingredients

For the pasta

  • 2 tbsp butter
  • 1 clove garlic
  • 3 tbsp Cajun seasoning
  • 1 onion thinly sliced
  • 1 bell pepper thinly sliced
  • 2 tbsp flour all purpose
  • 1 cup chicken stock
  • 1 cup heavy cream
  • salt and pepper to taste
  • Tobasco optional
  • 6 cups pasta cooked
  • 1/2 pound shrimp raw and peeled

Garnish

  • 1 tomato diced
  • 1/2 cup green onions thinly sliced

Instructions

  • PUT WATER ON TO BOIL FOR YOUR PASTA THEN START SAUCE

For the Sauce:

  • In a heavy bottomed pot over medium heat, melt 3 tablespoons of butter add garlic and Cajun seasoning.
  • Cook until aromatic (about 45 seconds)
  • Add in peppers and onions and cook until onions are caramelized and peppers are fork tender (about 7 min)
  • Add flour and mix until incorporated
  • Cook for about 1 min
  • Add chicken stock ¼ a cup at a time mixing until smooth in between
  • Add cream all at once and mix until smooth
  • Turn heat to medium low and add cooked pasta and stir until noodles are evenly coated
  • Add shrimp and cook until they are all pink and no longer translucent (about 3-4 minutes)
  • Garnish with tomato and green onions
  • ENJOY!

The Best Bread Pudding

Raise your hand if you love dessert! Great! If your hand isn’t up we are no longer friends… seriously. Okay, now raise your hand if you love easy desserts! If that’s you, you are in the right spot. Bread pudding is about as effortless as it gets for dessert and it is SO good. 

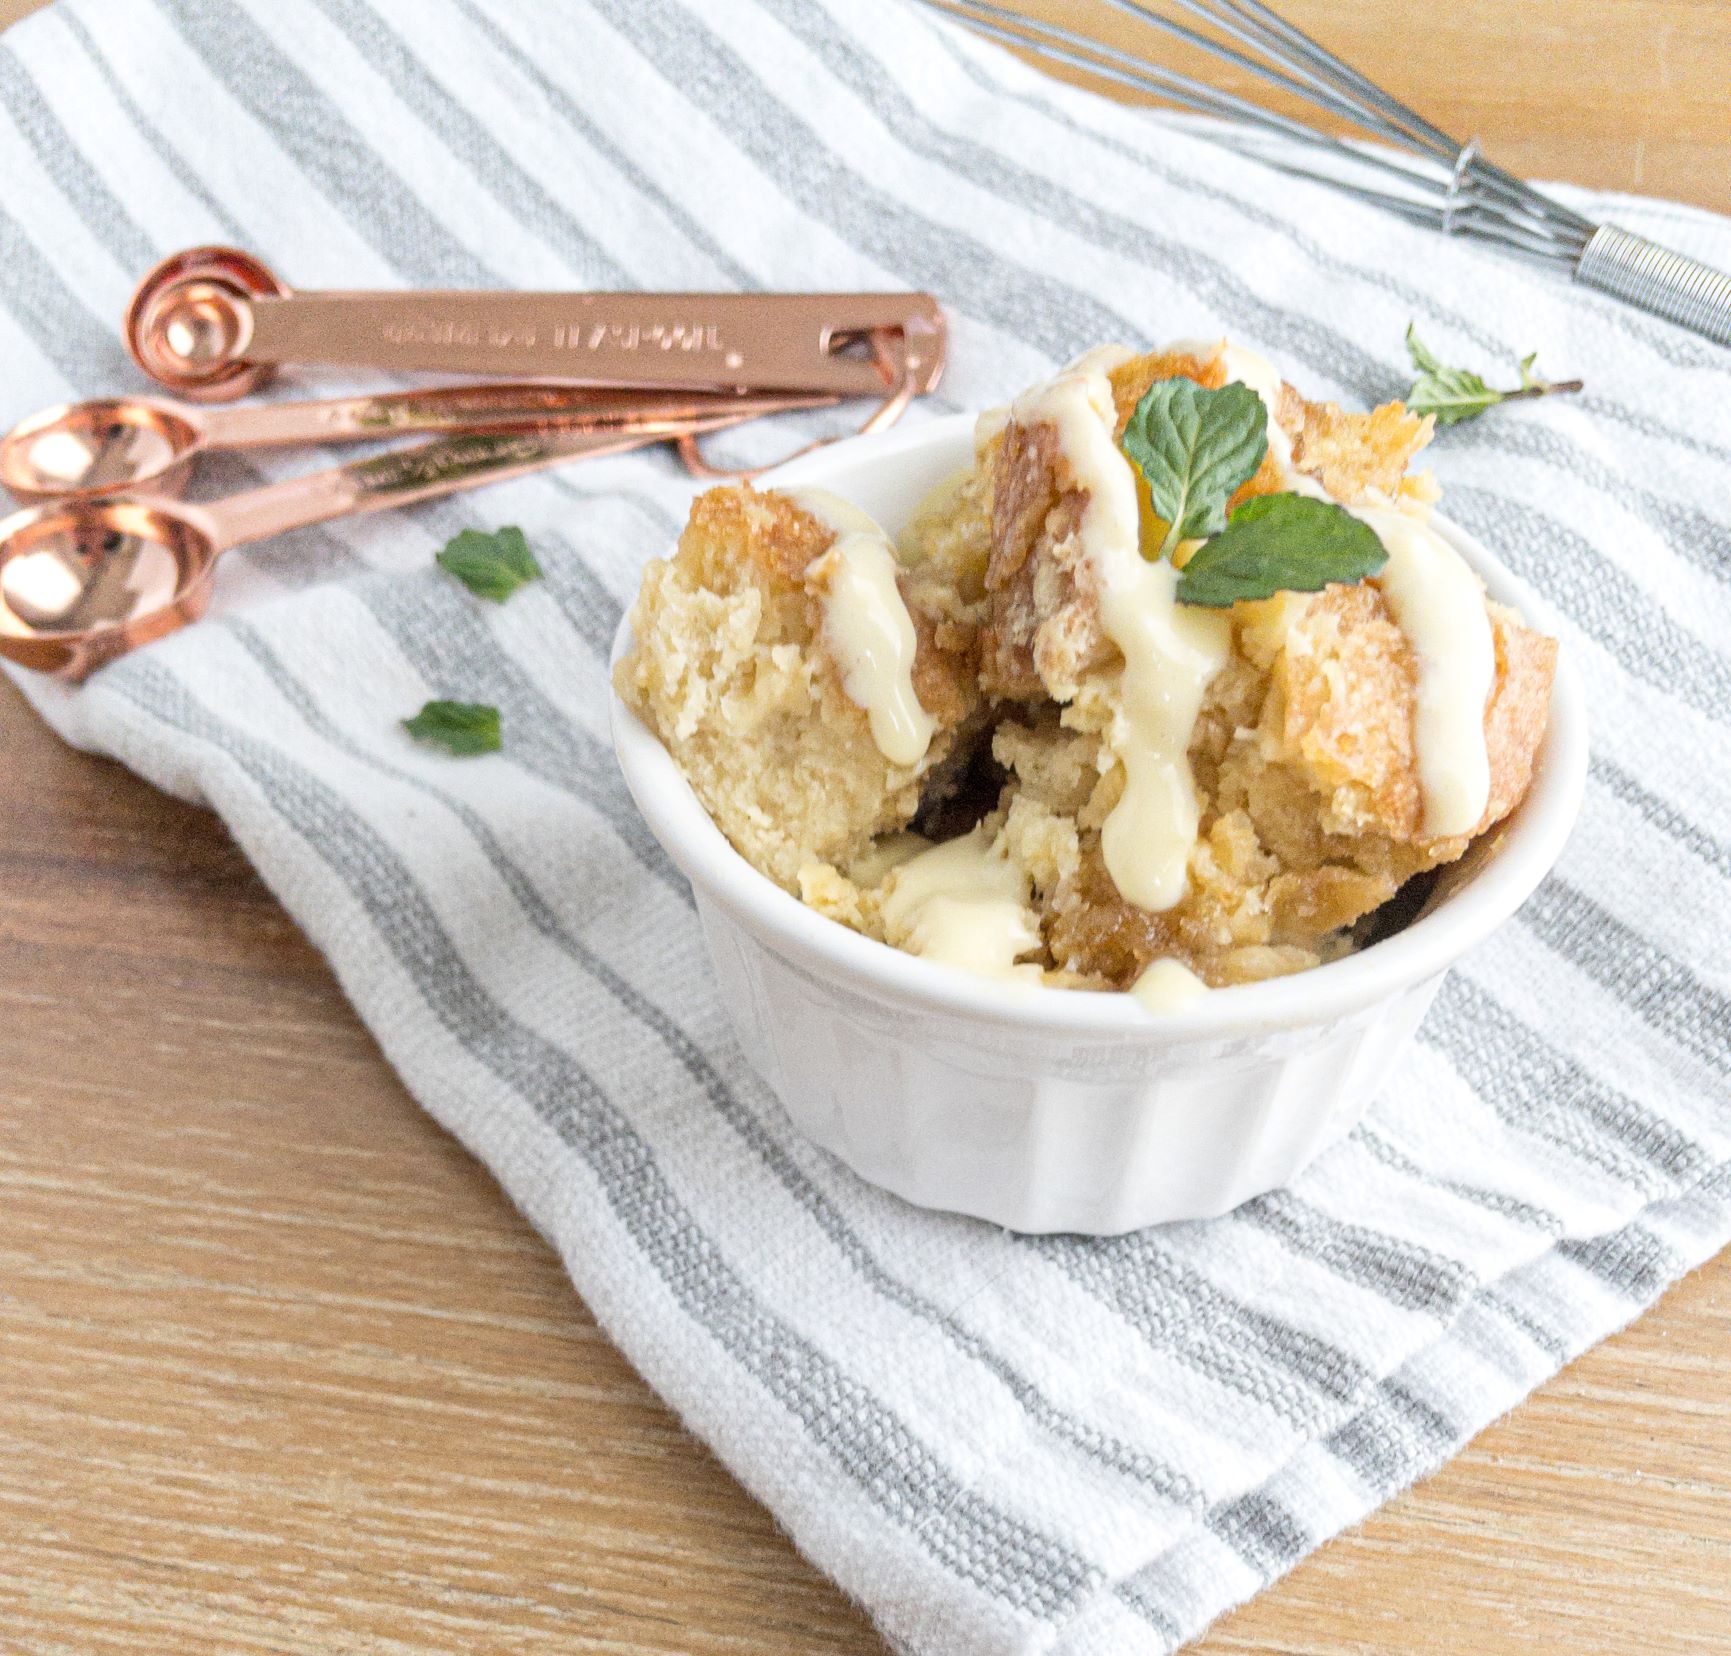
I have been making bread pudding for years. I have tried so many different things to get the perfect results and let me tell ya, I found it. This bread pudding is gooey and sweet and just melts in your mouth. I like to top it with vanilla ice cream or my limoncello custard sauce

Got some bread that has seen better days? Bread pudding. Need and easy way to satisfy your sweet cravings? Bread pudding. 

The other great thing about bread pudding is you can customize it. Chocolate, fruit, nuts, cinnamon, caramel, jam… did I say chocolate already..? It all works! 

Jump to Recipe

Some notes: 

Bread: 

You can seriously use whatever you want! One time my dad made raspberry bread pudding out of hamburger buns… weird, I know, but it worked! While you can use whatever you want, I usually use ciabatta for bread pudding because I like the chewy crust. You will need about 1 loaf of bread or 10 cups.

You need to soak your bread in the custard before baking so you get that delicious gooey texture in the middle. Soak it for at least 30-60 minutes.

Dress it up:

After soaking your bread it’s time to add your extras if you want. Fruit, chocolate, nuts, cinnamon, etc. Get creative!  

Baking:

Put your delicious bread pudding and all that delicious custard in a 9″x13″ pan and bake until a toothpick comes out clean. 

Top it off:

While it isn’t necessary to put a topping on your bread pudding, it is advised for ultimate deliciousness. You can do heavy cream, caramel, OR my Luscious Limoncello Custard Sauce!

If you somehow manage to have leftovers, it makes a great breakfast!

Print

The Best Bread Pudding

Course Breakfast, Dessert
Prep Time 15 minutes
Cook Time 50 minutes
Refrigerate 1 hour
Total Time 2 hours 5 minutes
Servings 8 servings

Ingredients

  • 1 loaf bread
  • 2 cups heavy cream
  • 1/2 cup brown sugar
  • 4 egg yolks
  • 2 eggs
  • 2 tbsp butter
  • 1/2 tsp salt
  • 3 tbsp brown sugar

Instructions

  • In a large bowl, mix cream, sugar, egg yolks, eggs, and salt.
  • Cut bread into 1 inch cubes and put in a bowl.
  • Soak for 3o min -1 hour.
  • Preheat oven to 375 degrees Fahrenheit.
  • Put bread mixture into 9"x13" pan.
  • Slice butter in to small cubes and put on top. Sprinkle the remaining 3 tablespoons of sugar on top.
  • Bake for about 50 min or until a toothpick comes out clean.

Check out what’s new!

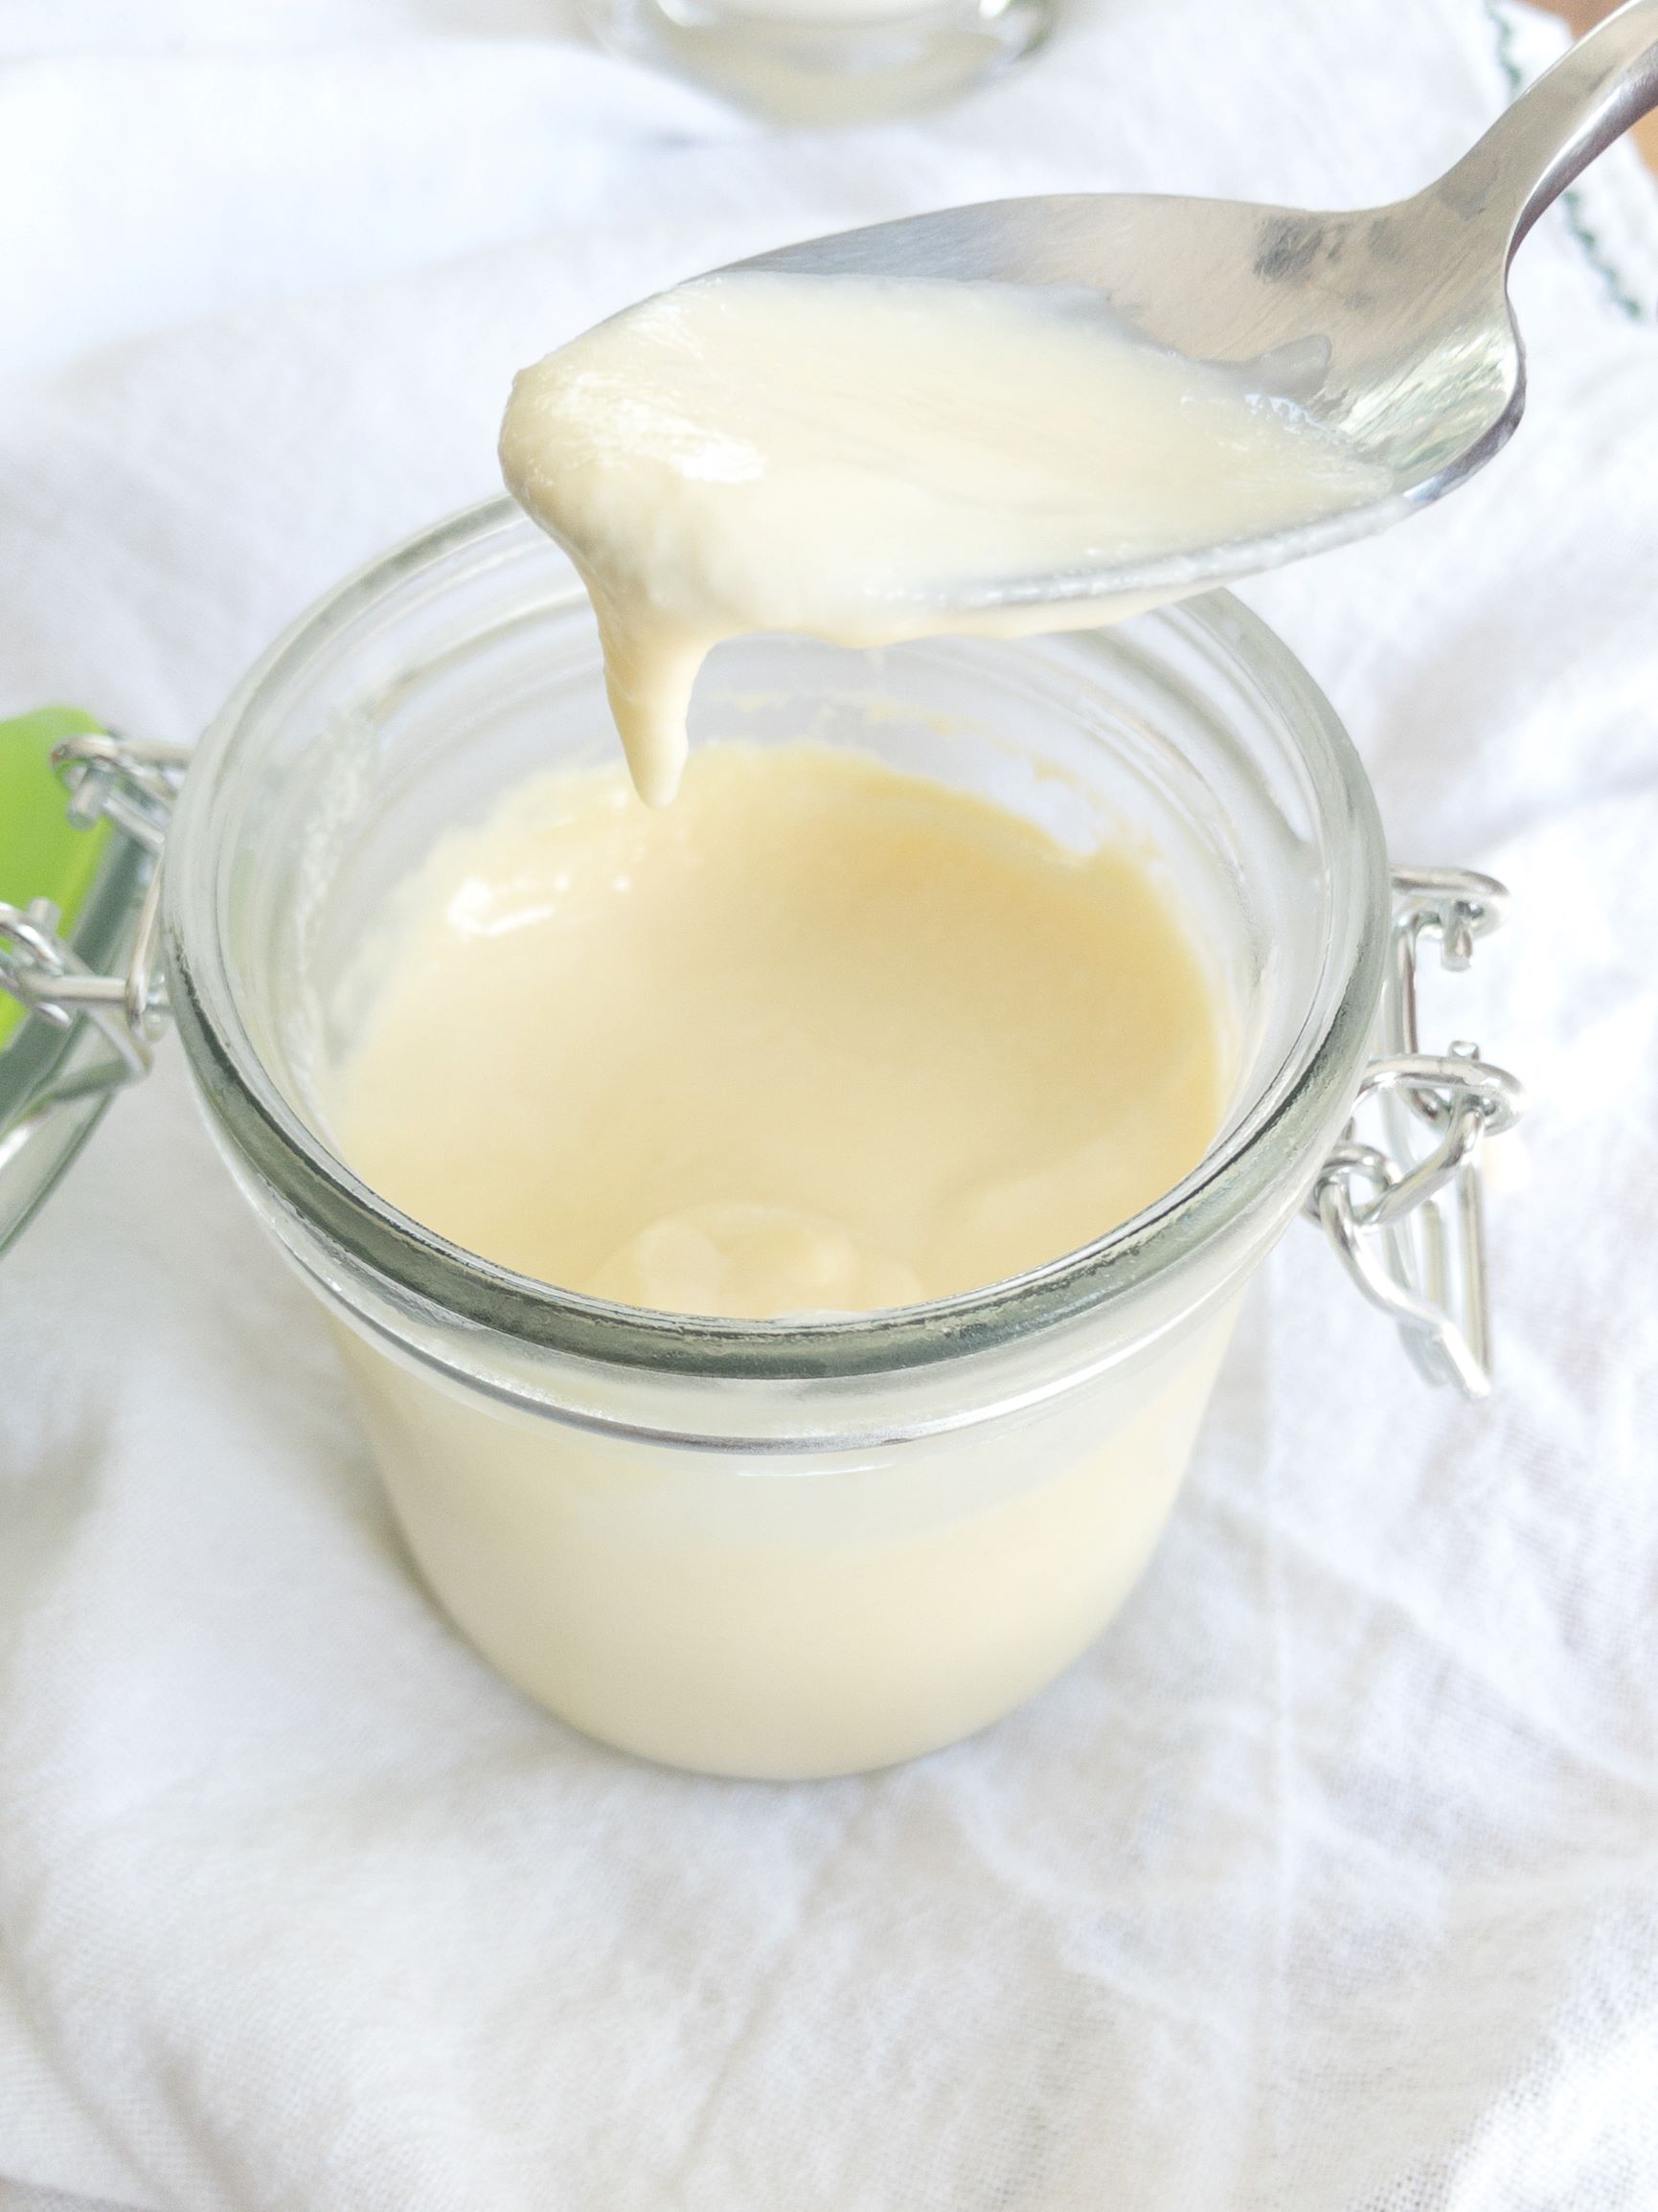
Luscious Limoncello Custard Sauce

Have you ever wondered what your desserts are missing? I’m here to let you in on a secret… it’s custard sauce! Pretty sure the pot of gold at the end of the rainbow is actually filled with this… but really, this custard sauce is seriously amazing. It’s great on berries, desserts, or just eat it with a spoon (no shame). The best part? It’s super simple to make.

Jump to Recipe

This sauce is a great way to show off your snazzy kitchen skills while only putting in a small amount of effort. That’s a win win in my book. If you really want to sound fancy you can call it crème anglaise, but if you aren’t great at remembering French vocab like me you can just call it custard sauce.

Some notes: 

Base:

To make the base, heat up milk and cream in a medium sized pot. I like to add Limoncello to my sauce to make it light and add some pizazz. If you want vanilla custard just cut the Limoncello and add 1 teaspoon of vanilla instead. You need to cook your custard base (milk, cream, limoncello) long enough that all the alcohol cooks out (unless you want fun custard sauce but that’s up to you). You will want to stir your base while it is heating up. 

Eggs:

In a separate bowl (preferably with some grip on the bottom), you need to whisk the egg yolks and sugar. I like to use an immersion blender with a whisk attachment for this part. Whisk the egg yolks until they are pale yellow. 

Temper:

I am a lover of scrambled eggs but they are not fantastic in custard dessert sauce… The secret to this sauce is whisk whisk whisk. I like to use an immersion blender with a whisk attachment or you can do it the old fashioned way. If you opt for the old fashioned way I recommend having a partner handy to swap off with you because about 2-3 minutes into vigorously whisking this you will feel…the…burn….and you can’t stop (learnt from personal experience).

To temper the sauce I use a ¼ measuring cup and add the base ¼ a cup at a time into the eggs while continuously whisking. After I have added about half the base, I can slowly add the rest of it from the pot directly into the eggs while continuously whisking. 

Final cooking:

After tempering the eggs in I put the custard mixture back into my pot on low heat and heat until you can run a finger down the back of your spoon and it stays clean. (Picture below)

Refrigerate: Now that you have made your sauce you will have to exercise some self restraint because it needs to refrigerate for about 2 hours to set up… then you can eat it. In the meantime, you can make my bread pudding.

Enjoy! 

Luscious Limoncello Custard Sauce
Print

Limoncello Custard Sauce

Delicious Custard Sauce for Desserts
Course Dessert
Keyword Creme Anglaise, Dessert, easy
Prep Time 10 minutes
Cook Time 20 minutes
Refrigerate 2 hours
Total Time 2 hours 30 minutes
Servings 6

Ingredients

  • 1 cup milk whole
  • 3/4 cup heavy cream
  • 4 tbsp limoncello
  • 4 egg yolks
  • 1/4 cup sugar granulated

Instructions

  • Whisk eggs and sugar in bowl until pale yellow and ribbons
  • In a medium sized pot, heat milk, cream, and limoncello on medium low heat until it steams
  • Add the cream mixture to your egg mixture 1/4 a cup at a time while continuously whisking.
  • Put the mixture back in the pot and cook on low heat while stirring until you can run a finger down the back of spoon and it stays clean.
  • Refrigerate custard for 2 hours
Easy Potato and Leek Soup

The Best Potato and Leek Soup

Lets be honest.. leeks are an odd vegetable. While they may seem intimidating, I promise they will quickly become one of your favorite vegetables. This soup is great year round. It’s light, flavorful, and really simple to make!

Jump to Recipe

Some notes: 

Lets talk about leeks: Some of you may be thinking what in the world is a leek? A leek is a cousin to garlic, onions, shallots, etc. They are in season in the spring. When preparing leeks you need to take a couple of extra steps.

The part of the leek you want to use is the light green-white section. Chop off the dark green top and the bottom. When these lovely green things grow they get sand and dirt stuck in their leaves. The easiest way I know of to clean leeks is to slice them, put them in a bowl of water, and stir them around for a bit. Then I scoop them off the top with a slotted spoon.

Don’t worry these guys are worth the extra work. 

Potatoes: Really you can use whatever potato you like in this soup. I do recommend picking a waxy potato (red or yukon gold) because they tend to hold their shape better and not get mushy in the soup. 

Blend or not to blend? This soup is great either way! I usually blend it about half way so it’s thick but still has texture. 

Bacon: You can omit the bacon and use vegetable stock to make this recipe vegetarian! Add a little paprika to get that smokiness. 

GLUTEN FREE: Enough said there… that’s just a win.

Toppings: We all know soup is better with toppings. Top with toasted pumpkin seeds, or you can make croutons by tossing bread in a pan with butter until crisp.

NOW THE MOMENT YOU HAVE BEEN SCROLLING FOR BRING ON THE LEEKS   

Print

Potato and Leek Soup

Easy potato and leek soup
Course Soup
Keyword dinner, easy, gluten free, healthy
Prep Time 10 minutes
Cook Time 45 minutes
Servings 4 People

Ingredients

  • 4 strips bacon
  • 1 tbsp butter
  • 3 leeks sliced
  • 5 red potatoes diced
  • 1 clove garlic minced
  • 2 1/2 cups chicken stock
  • 1 bay leaf
  • 1 tsp thyme fresh
  • salt and pepper

Instructions

  • Cook bacon in medium sized pot until crisp
  • Add butter, leeks, potatoes, and garlic. Cook until until leeks are tender
  • Add chicken stock and bay leaf
  • Simmer until potatoes are fully cooked
  • Blend with an immersion blender
  • Add thyme. Salt and pepper to taste